dev-resources.site
for different kinds of informations.
Teslamate data logger, AWS and Raspberry PI
In this blog post, I want to share how I installed and configured Teslamate - A powerful, self-hosted data logger for my Tesla car on a Raspberry PI running Ubuntu. I will also list other AWS Cloud Options I considered to host this data logger and the challenges I faced.
I own and drive a Tesla Model 3 here in Australia. For your car, Tesla provides an API which can be polled to get the logging data and store it in a local database. This data can be further used to build visualization dashboards and perform any kind data analysis using Grafana.
Teslamate
Before going further, few details on Teslamate. This is an open source software developed by Adrian Kumpf / others and is distributed under MIT License. More details about this project can be found here.
There are many installation options, I will be using advanced option with Traefik, Let's Encrypt & HTTP Basic Auth.
I have a few Raspberry PIs running on my home network, which I use for my learning and experimentation. I had written a blog here, on how I manage them using AWS Systems Manager.
Before ending up using Raspberry PI for hosting Teslmate, with cost being priority, I explored few options on AWS:
AWS EC2 Instance: This was the simplest option. I could have used the EC2 options eligible under AWS Free tier + an Elastic IP address (NOT FREE). However, it would cost me after free tier expires.
Deploy applications on Amazon ECS using Docker Compose - I tried this option using ECS Fargate. However, I ran into issues like ECS Fargate not supporting bind mounts. Also, this solution creates and deploys a CloudFormation stack with Amazon EFS resources which in-turn will add up-to the cost for hosting a simple personal data-logger.
Automated software delivery using Docker Compose and Amazon ECS - I tried this, which is an extension of above solution with continuous delivery using AWS CodePipeline, AWS CodeBuild, and Amazon ECR. It worked fine. However, the stack includes provisioning resources like Load Balancer and CI CD Pipelines which again for me, was an overkill for a simple personal data-logger. Also, major changes to Teslamate open source software is also not too often.
So, I zeroed in on hosting Teslmate on one of my Raspberry PIs (for which i have already payed for) and use my personal domain (hosted on AWS Route53) for accessing the Teslamate Web App and Dashboards.
Steps to install and configure Teslmate on Raspberry PI.
- First, let us update the available list of packages and upgrade any out-of-date packages for Ubuntu.
sudo apt-get update && sudo apt-get upgrade
- I already have docker and docker-compose installed on my Raspberry PI. You can use the following commands to install the same:
sudo apt install docker-compose
For current user to interact with Docker, we must add it to the “docker” group. You can do the same using below command:
sudo usermod -aG docker $USER
You need to logout and log back in for the changes to take effect.
- Next, we create a new directory telsamate and navigate to this folder.
mkdir teslamate
cd ~/teslamate
Follow the steps in teslamate advanced installation guide to create 3 files inside teslamate folder you created above.
docker-compose.yml
.env
.htpasswd
With this advanced installation option, few things to note are:
We use a reverse proxy (Traefik) which terminates HTTPS traffic. Publicly accessible TeslaMate and Grafana sit behind this reverse proxy.
Let's Encrypt certificate is automatically acquired by Traefik.
TeslaMate service is protected by HTTP Basic Authentication.
Grafana is configured to require a login
- Now, we can start the stack using:
docker-compose up -d
This will download the latest version of Teslamate along with Grafana, Postgres and Mosquitto.
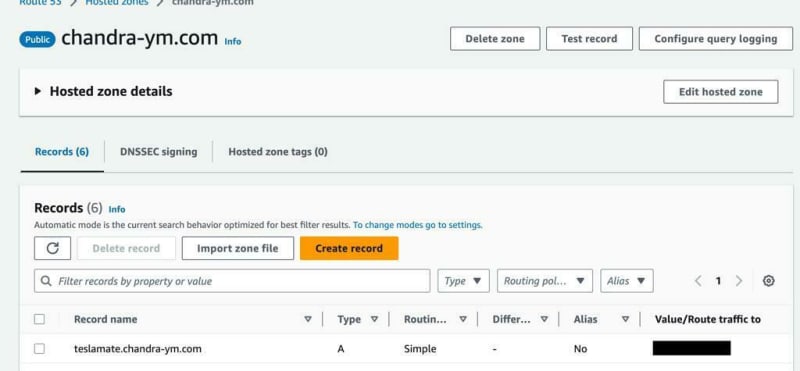
- As mentioned earlier, I have my own personal domain (chandra-ym.com) registered and managed on Amazon Route53. I created an A record on the related hosted zone to direct the traffic for teslmate.chandra-ym.com to the IP address of my Raspberry PI.
When I first logged into https://teslamate.chandra-ym.com/, which is protected by HTTP Basic Authentication, I need to enter the username and password used to generate the token for .htpasswd file created in step 4.
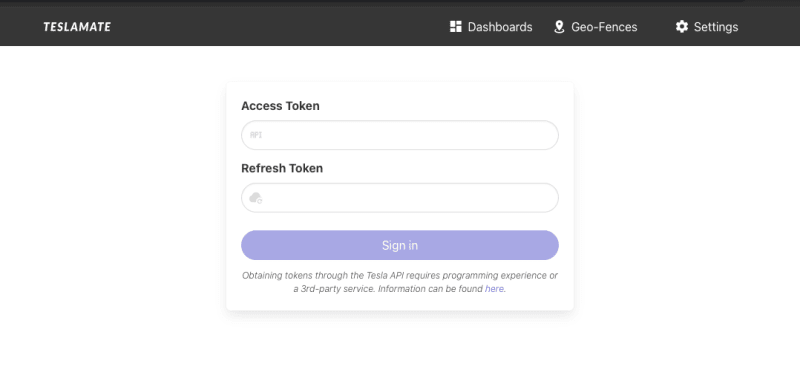
Next, you are presented the login screen, where you can enter the Tesla API credentials, which uses Access Token and Refresh token. I use iOS app Auth for Tesla to generate these tokens, based on my actual Tesla account credentials. These are temporary tokens with expiration time.
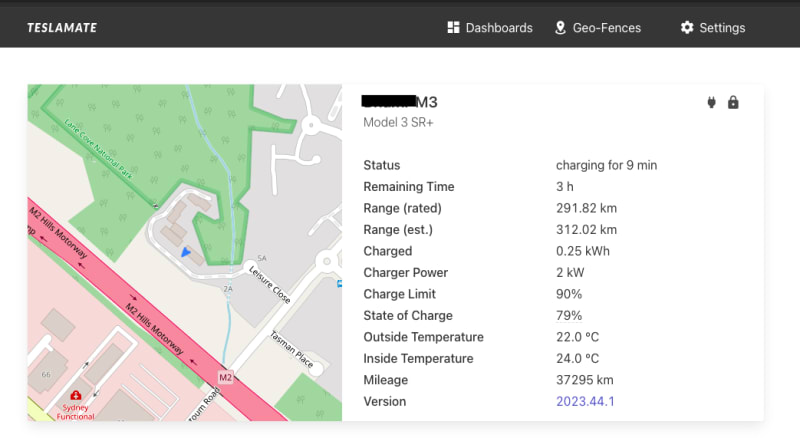
- Once you login with the tokens, you can see the Teslamate web interface with vehicle summary:
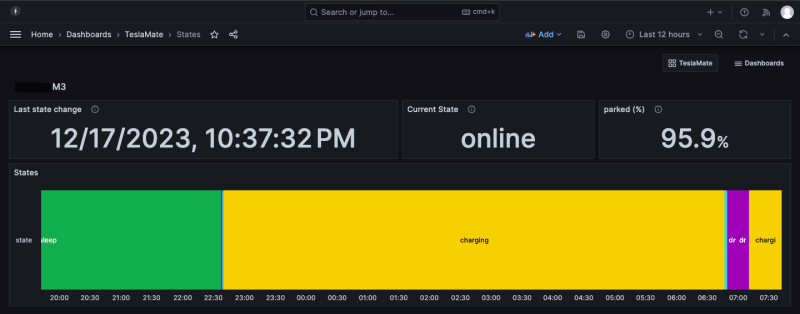
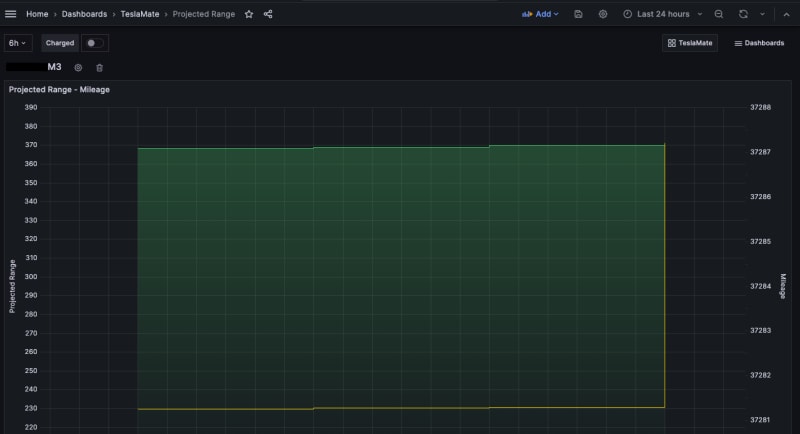
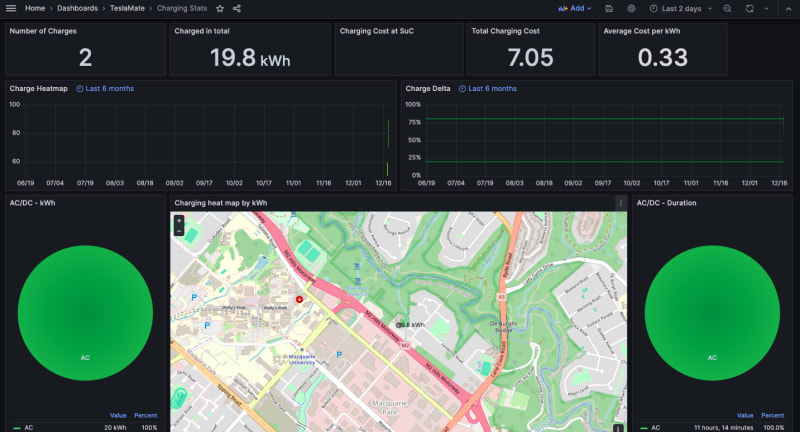
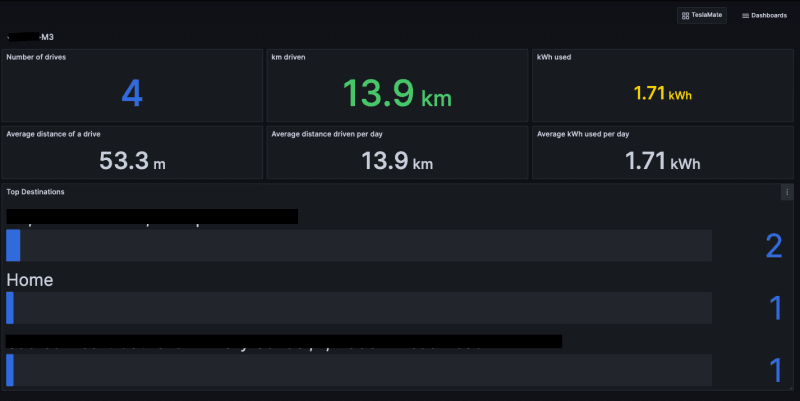
Some of the visualisations built into Teslmate:
Overview:
States:
Projected Range:
Drive Details:
Charging Stats:
Drive Stats:
Drives:
Efficiency:
Charge Details:
Charges:
Conclusion
At this point of time, Raspberry Pi seemed to be the cheapest option to host this data logger. I know there many free and paid apps available out there for the same purpose. I will continue to explore cost effective options on AWS to host Teslamate and come up with related blog posts in future.
Thanks for reading. Please provide any feedback, in the comments section.
Featured ones:


