dev-resources.site
for different kinds of informations.
OCaml, Python and protobuf
Time to explore protobuf with code! I'll start by trying to share a message between an OCaml and a Python application.
Beginning first with making a directory structure for the project.
mkdir simple-protobuf-example && cd $_

# Create a directory for the python project
mkdir -p src/python
touch src/python/main.py

# Create a directory for the proto files
mkdir src/proto

# Create a OCaml project
dune init proj ocaml ./src

# Install the OCaml protobuf compiler
opam install ocaml-protoc

# Open the IDE
code .
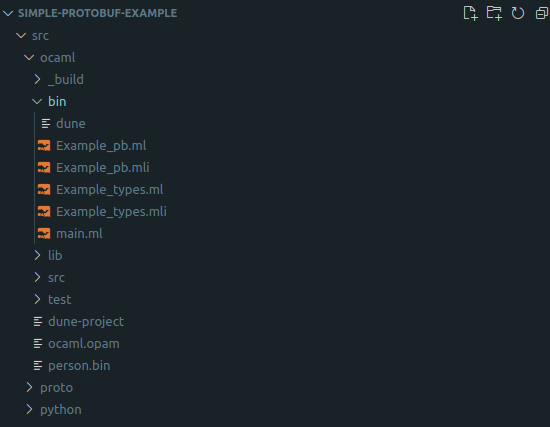
To start, we'll install the open source protobuf compiler, ocaml-protoc. We'll use this for the OCaml project, which is where we'll start. The project tree structure will look like this.
Create a new file in named, Example.proto, in the directory, src/proto, that looks like this.
message Person {
    string name = 1;
    int32 age = 2;
    repeated string hobbies = 3;
}
Use this command from the root of the project structure to generate OCaml types along with serialization functions for the binary encodings.
simple-protobuf-example ocaml-protoc -binary -ml_out ./src/ocaml/bin/ ./src/proto/Example.proto
The generated files should now be in the bin directory of the OCaml project.
The Example_types.{ml|mli} file has the type definition along with a constructor function to conveniently create values of that type.
type person = {
  name : string;
  age : int32;
  hobbies : string list;
}

let rec default_person
  ?name:((name:string) = "")
  ?age:((age:int32) = 0l)
  ?hobbies:((hobbies:string list) = [])
  () : person  = {
  name;
  age;
  hobbies;
}
Here we can see how the Example.proto file was compiled/transpiled to OCaml code. The Example_pb.{ml|mli} file has the code for the binary encodings (because of the -binary command line switch earlier).
To use this code we'll need to update the main.ml file.
open Example_types
open Example_pb

let () =
  (* Create a person *)
  let person = { name = "Tony Stark"; age = 42l; hobbies = ["AI"; "Jarvis"] } in

  (* Encode the person *)
  let encoder = Pbrt.Encoder.create () in
  encode_person person encoder;
  let bytes = Pbrt.Encoder.to_bytes encoder in

  (* Write the bytes to a file *)
  let oc = open_out "person.bin" in
  output_bytes oc bytes;
  close_out oc
This code is serializing a person record to a file called, person.bin.
There is also a need to update the dune file (in the bin directory) so it includes the pbrt library.
(executable
 (public_name ocaml)
 (name main)
 (libraries ocaml pbrt))
To run the program we are executing following command in the ocaml directory.
dune build
dune exec ocaml
This should produce a person.bin file which is in a binary format.
Now we are done with the first part, to produce a binary message of a serialized person in OCaml. Next step is to de-serialize the person.bin file in Python.
To work with protobuf in Python will need to start to make sure that we have installed the official protobuf compiler. If you haven’t installed the compiler, download the package and follow the instructions in the README.
# Check the current version, I'm using libprotoc 24.4
protoc --version

# Go to the python project directory
cd src/python

# Copy the person.bin file to the python directory for convenience
cp ../ocaml/person.bin .

# Create a virtual environment for the project
pyenv virtualenv 3.9.0 protobuf
pyenv activate protobuf

# Install needed python packages
python -m pip install protobuf
python -m pip freeze > requirements.txt

# Generate the classes you’ll need to read Person
protoc --python_out=./ --proto_path=../proto/ Example.proto
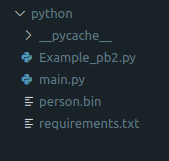
The last command should have generated a file called, Example_pb2.py.
Finally we need to read the file and de-serialize the content with the help of the generated protobuf code. Update the main.py file with this code.
import Example_pb2

def main():
    # Read the binary file
    with open("person.bin", "rb") as f:
        # Deserialize the content using protobuf
        person = Example_pb2.Person()
        person.ParseFromString(f.read())

    # Access the deserialized data
    print(person.name)
    print(person.age)
    print(person.hobbies)

if __name__ == "__main__":
    main()
Lets run and see if it works.
It's working! Hurray!
Featured ones:


