dev-resources.site
for different kinds of informations.
Disabling Highly Privileged Azure AD Users with Azure Logic Apps and Microsoft Graph API
If you're using Logic Apps to disable users in Azure AD with the Azure AD connector and encounter a 403 forbidden error, it might be because the user is part of a role-assignable group. Members of these groups are considered highly privileged.
As a result, your Logic App lacks the necessary permissions to disable these users via the Azure AD connector - even if your Azure AD account has an RBAC role such as Privileged Authentication Administrator or Global Administrator.
Unfortunately, we can't add Graph permissions directly to the Logic App. But don't worry, with some Jedi mind tricks, you can get around it! 🧙
Application Configuration
First, register a new application and define permissions to access and interact with Azure AD via the Graph API. Here's how to do it:
- In the portal, navigate to App registrations > New registration.
- Give it a memorable name and select Register.
- Note the Application (client) ID for later use.
Once the app is registered, add a new client secret and the required API permissions as follows:
Adding a client secret
- Select your application.
- Navigate to Certificates & secrets > Client secrets > New client secret > Add.
- Note the Secret value for later use.
Configuring permissions
Next, configure permissions for the application. Review these permissions and others in the Graph documentation here.
- Navigate to API permissions > Add a permission.
- Select Microsoft Graph > Application permissions and add the following permissions:
- Directory.ReadWrite.All
- Group.ReadWrite.All
- User.EnableDisableAccount.All
- User.ReadWrite.All
- Select Grant admin consent for Default Directory and confirm.
Your application is now configured. To enhance security, let's add the client secret to Key Vault.
Azure Key Vault Configuration
Key Vault is an Azure key management solution that provides secure storage and management of keys, certificates, and secrets. Here's how to create a Key Vault:
- In the portal, navigate to Key vaults > Create.
- Select your Resource group.
- Give it a memorable name and select your region.
- Standard pricing tier should suffice.
- Navigate to Access Policy and set permission model to Azure role-based access control.
- Create the Key Vault.
Now that the Key Vault is created, add the application client secret as follows:
- Assign yourself permission to the Key Vault (e.g., Key Vault Administrator), see all available roles here.
- Navigate to your Key Vault.
- Navigate to Secrets > Generate/import.
- Give it a memorable name.
- Paste your client secret value from earlier.
- Select Create.
Now that your client secret is secured, create your Logic App and put all the pieces together!
Logic App Configuration
Create a new Logic App resource. Here's how:
- Select your Resource group.
- Select Create, search for Logic App, and select Create.
- Select your preferred Subscription, Resource group, and Region.
- Give it a memorable name.
- Select Review + create > Create.
- Navigate to your new Logic App.
- Select Identity > Enable System assigned managed identity.
- Select Azure role assignments > Add role assignment
- Scope: Key Vault
- Subscription: Select your subscription
- Resource: Select the Key Vault we created earlier
- Role: I will be using Key Vaults Secrets User, but you can choose any sufficient role from the doiumentation here.
Workflow Configuration
- Navigate to your new Logic App.
- Select Logic app designer, you can start with a template or select Blank Logic App.
- Add the Azure Key Vault Get secret action
- Give your connection a memorable name
- Authentication type: Managed identity
- Vault Name: Enter the name of your Key Vault resource
After the API connection is authenticated, select the name of your secret.
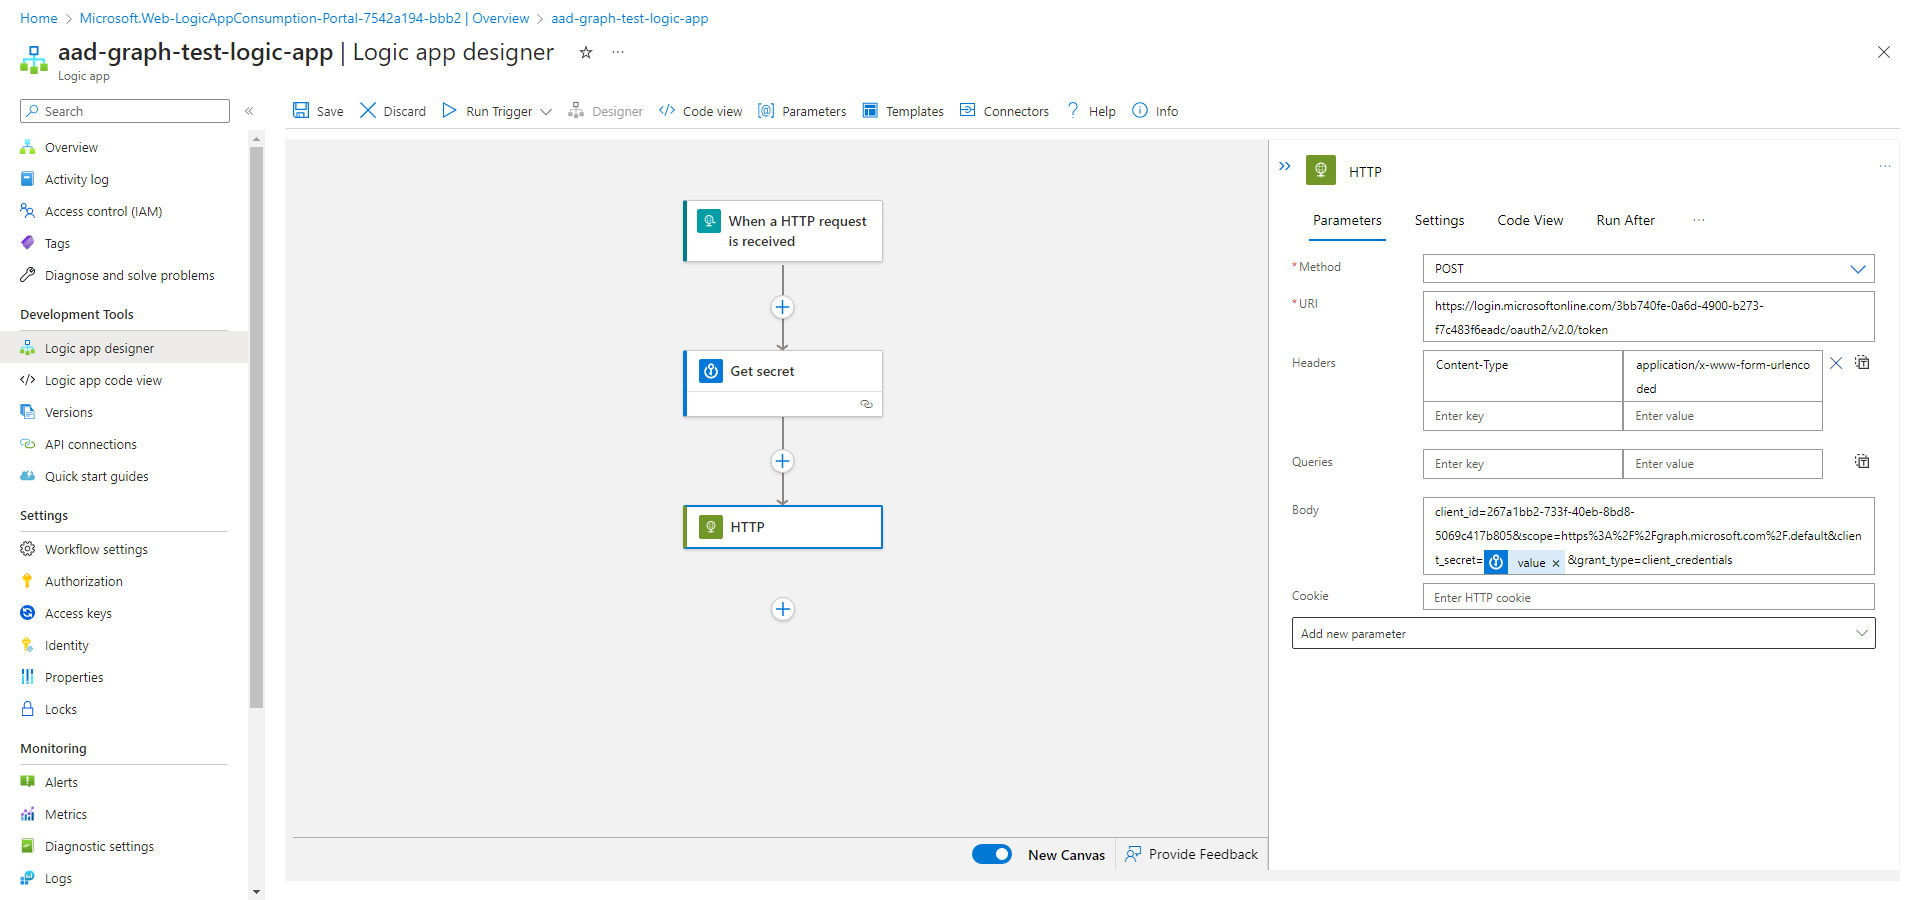
Add an HTTP action and configure like so:
- Method: POST
- URI (Make sure to remove the braces and populate with your values):
- Headers:
- Content-Type: application/x-www-form-urlencoded
- Body (Make sure to remove the braces and populate with your values):
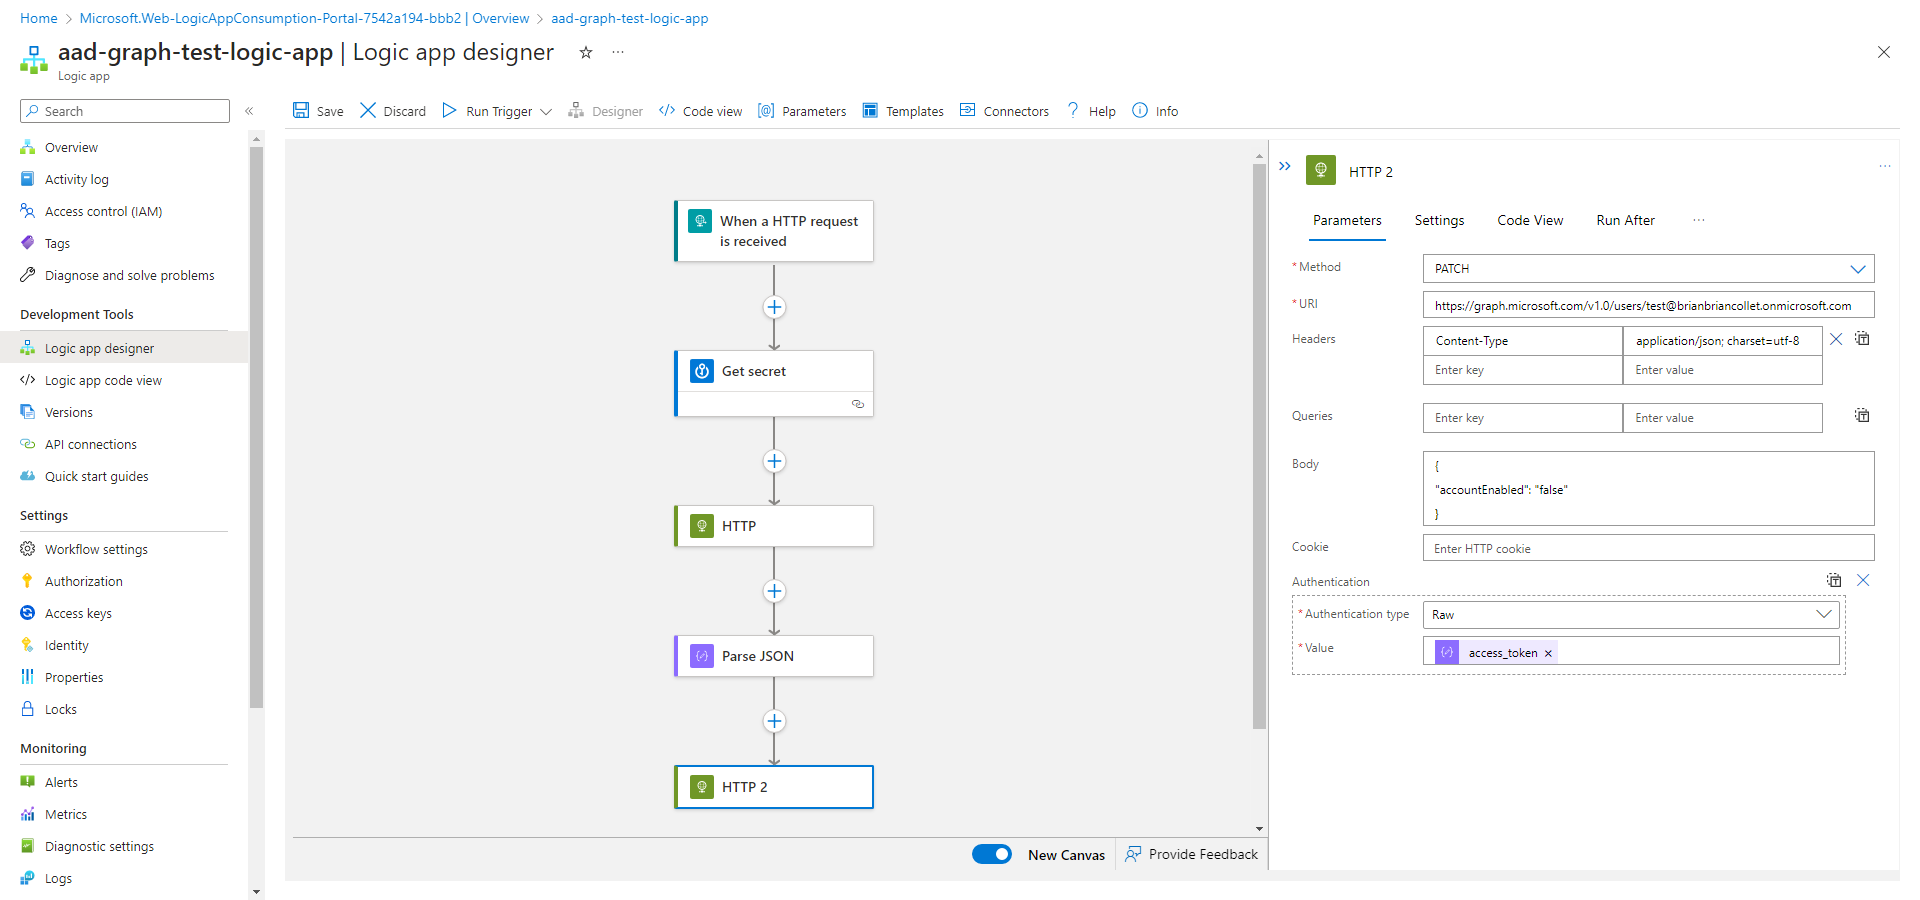
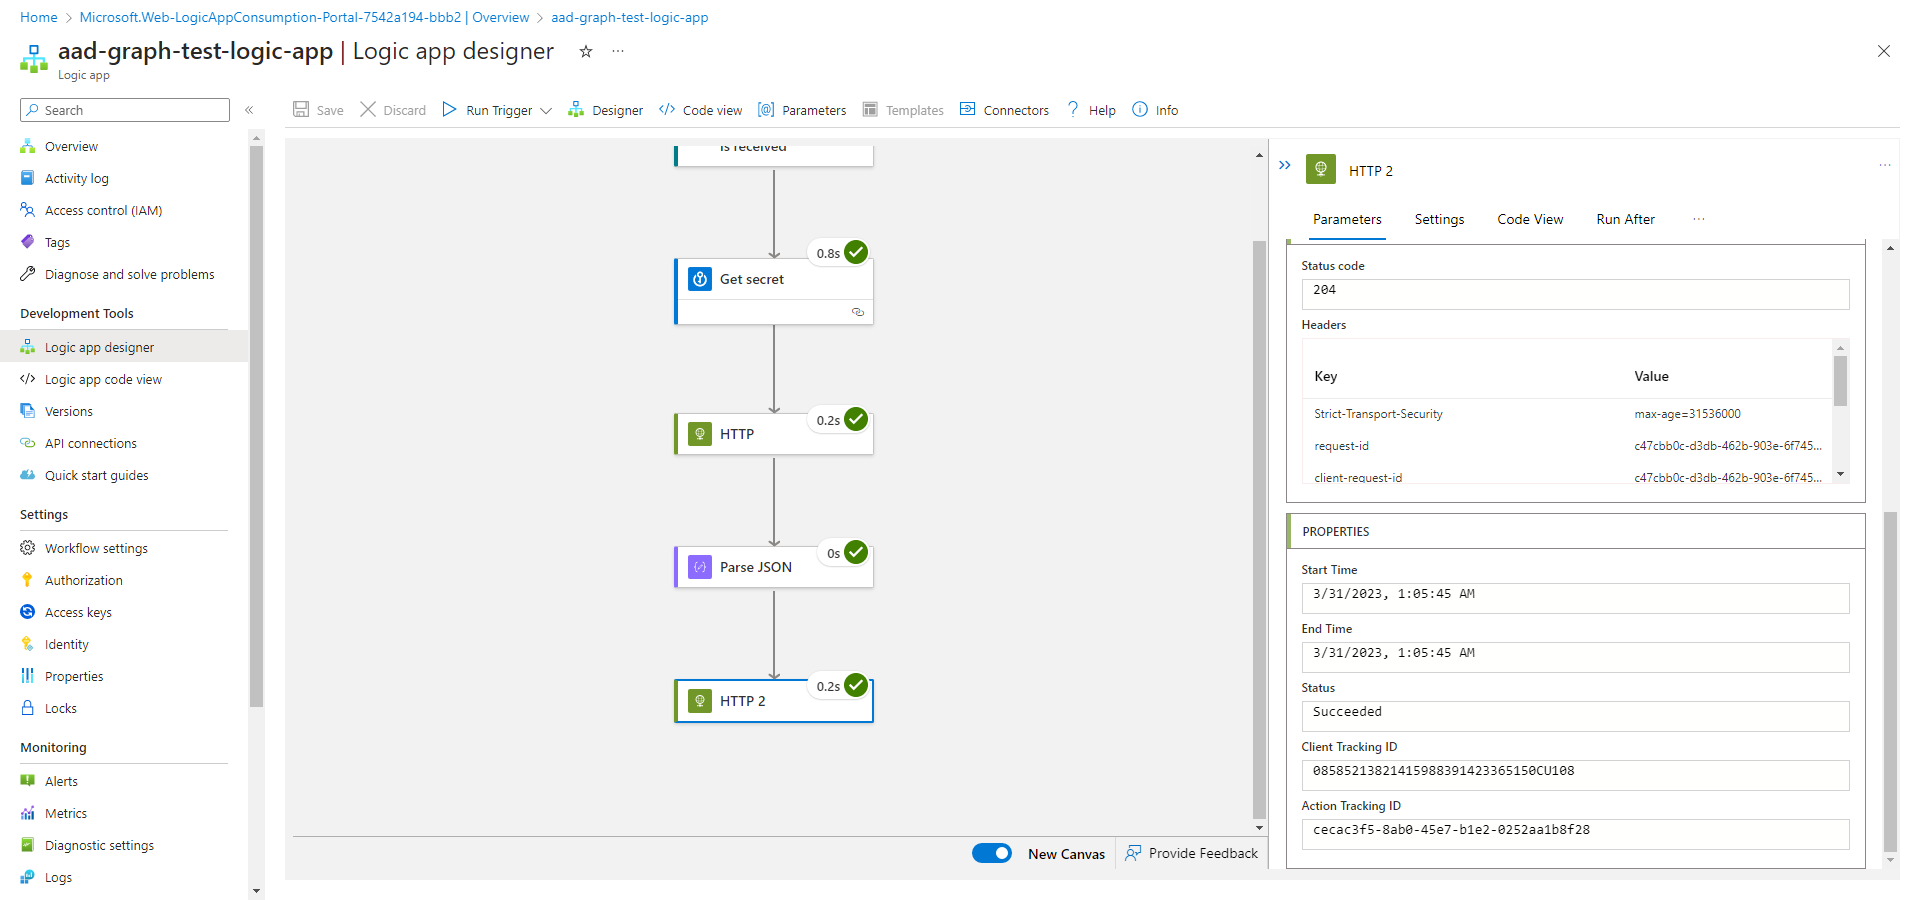
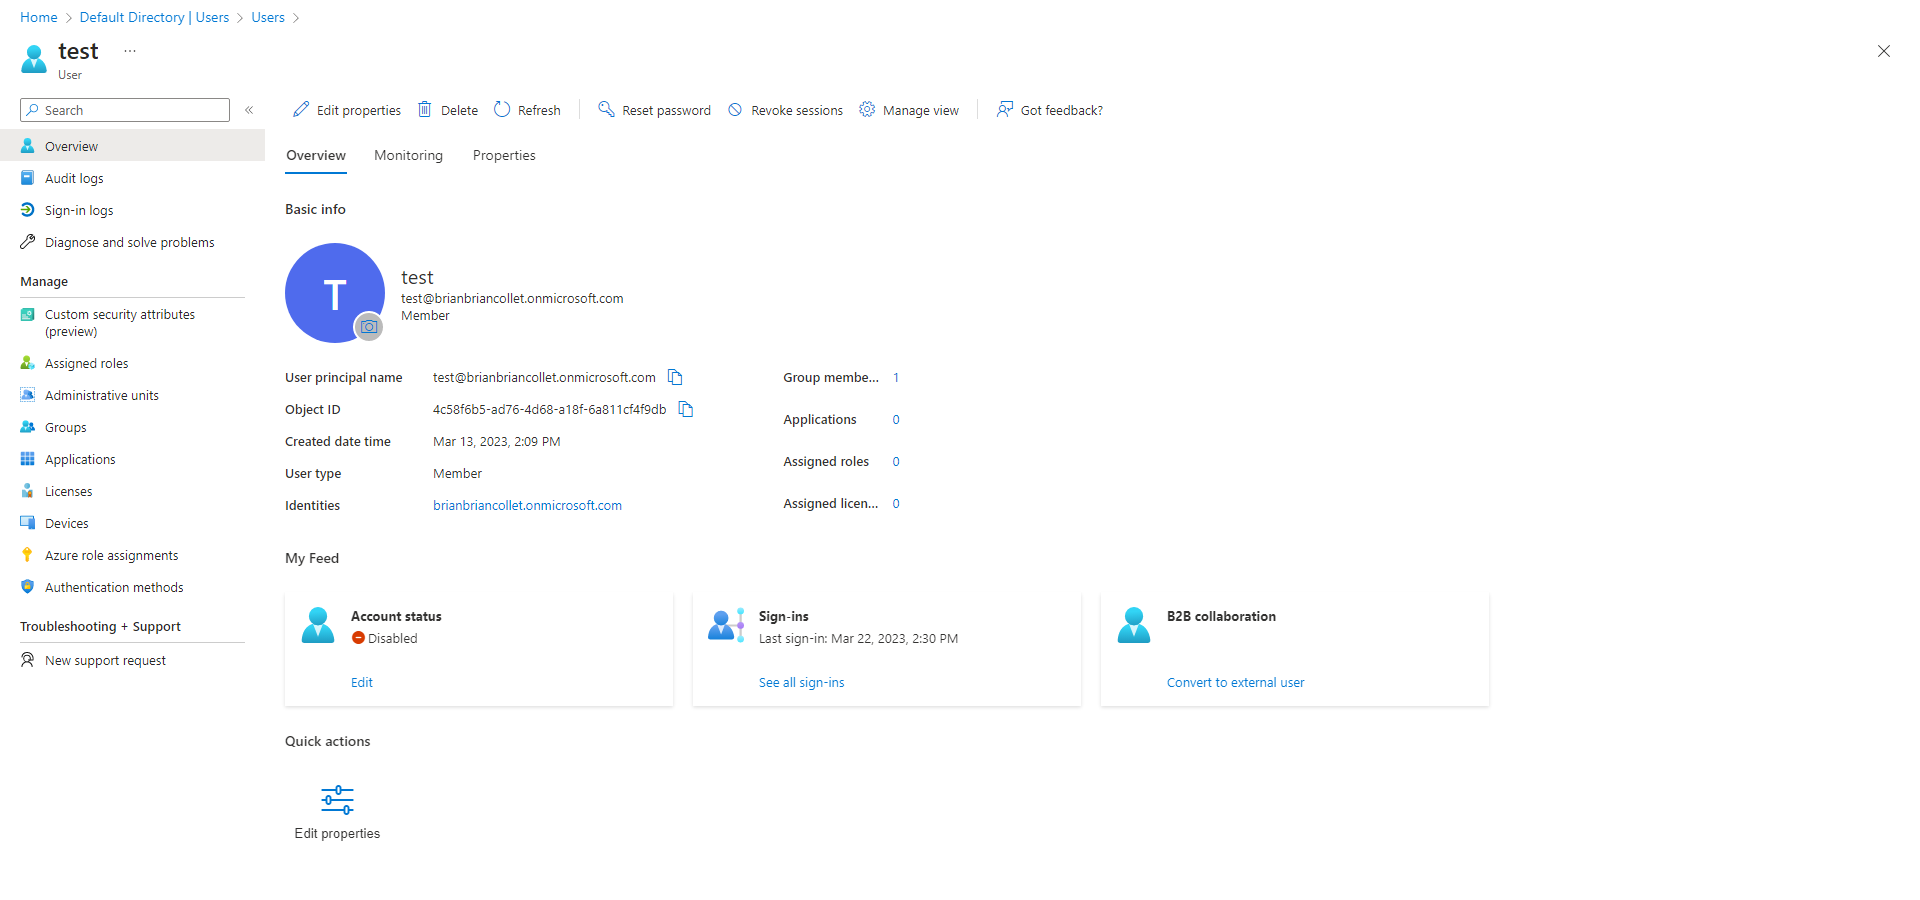
</li> </ul> <p>client_id={INSERT-YOUR-APPLICATION-CLIENT-ID}&scope=https%3A%2F%2Fgraph.microsoft.com%2F.default&client_secret={INSERT-YOUR-APPLICATION-SECRET-VALUE}&grant_type=client_credentials</p> <p></p> <div class="highlight"><pre class="highlight plaintext"><code>  This first HTTP request will be to acquire our authentication token. The documentation regarding this process can be found [here](https://learn.microsoft.com/en-us/azure/active-directory/develop/v2-oauth2-client-creds-grant-flow#first-case-access-token-request-with-a-shared-secret). Now we need to parse the JSON response in order to use the token in our call to Graph. Add a Parse JSON action and configure like so: - Content: Body (from previous HTTP action) - Schema: ```json { "properties": { "access_token": { "type": "string" }, "expires_in": { "type": "integer" }, "ext_expires_in": { "type": "integer" }, "token_type": { "type": "string" } }, "type": "object" } </code></pre></div> <p><img src="https://dev-to-uploads.s3.amazonaws.com/uploads/articles/787r409bg93799rp3at9.png" alt="Add a Parse JSON action"></p> <p>Now the part you've been waiting for - disabling the user!</p> <ul> <li> <p>Add another HTTP action, and configure like so: </p> <ul> <li>Method: PATCH</li> <li>URI (Make sure to remove the braces): <ul> <li> <a href="https://graph.microsoft.com/v1.0/users/%7BINSERT-AZURE-AD-USER-UPN-HERE%7D">https://graph.microsoft.com/v1.0/users/{INSERT-AZURE-AD-USER-UPN-HERE}</a> </li> </ul> </li> <li>Headers: <ul> <li>Content-Type: application/json; charset=utf-8</li> </ul> </li> <li>Body: ```json </li> </ul> <p>{<br> "accountEnabled": "false"<br> }</p> </li> </ul> <p></p> <div class="highlight"><pre class="highlight plaintext"><code> - Select **Add new parameter** > **Authentication** - Authentication type: Raw - Value: access_token (from Parse JSON action)  - Save your workflow and **Run Trigger** to test.  - Verify the account was disabled.  Thank you so much for taking the time to read my blog post. I hope you found it informative and helpful. If you have questions or feedback, please don't hesitate to reach out. </code></pre></div>
Featured ones:


