dev-resources.site
for different kinds of informations.
Getting Started with Hedera Hashgraph with OpenZepplin
Terms like Blockchain, Crypto, smart contracts, NFT, and DeFi are no longer new words for netizens. Most of them have a somewhat good understanding of what they mean and there are plenty of resources available to get to know about them too.
The blockchain industry is constantly evolving, with new protocols being developed and existing ones being improved upon. Today, I’m going to write about how to start your development with an interesting blockchain protocol available, Hedera.
Like most of the smart contract developers out there, I too started my blockchain journey with Ethereum and writing smart contracts using solidity. Solidity was created in 2014 by Dr. Gavin Wood, in order to meet Ethereum’s demand for a Turing-complete programming language for creating smart contracts.
Nearly a decade later, solidity is still the most popular smart contract language to date because of the less-learning curve and its similarity to javascript. If you know how to write smart contracts in solidity, that means you automatically know how to work with several EVM-based blockchain protocols including Arbitrum, Avalanche, Binance Chain, Optimism, Polygon, etc.
Before diving into the code, allow me to give TL;DR information about Hedera and why it’s actually interesting. For people who already know about Hedara, you can skip to the development guide straight away.
What is Hedera Hashgraph and why it’s Interesting?
- Hedera Hashgraph is a distributed ledger technology
- It uses a patented consensus algorithm called the Hashgraph to achieve fast and secure consensus
- It is designed to be a fast, fair, and secure public network that can support a wide range of decentralized applications
- Hedera Hashgraph is bundled with a set of benefits including high throughput, low latency, fair ordering of transactions, and strong security.
- Hedera Hashgraph uses advanced encryption and consensus algorithms to ensure that transactions are secure and cannot be tampered with.
- Hedera has a unique governance model that allows for decentralized decision-making and ensures that the platform remains fair and accessible to all participants
For more information, you can go through the official documentation of Hedera Explained and How it works.
History of Hedera’s support of Solidity
Hedera didn’t support writing smart contracts using solidity from Day 1. Developers used “Hedera API” (now deprecated) with existing languages such as JavaScript or Java to interact with its hashgraph. But, this made adoption a little slower even though API could leverage its high throughput and fast transaction finality.
Hedera started to support Solidity in early 2021. It started with supporting Solidity version 0.4.25 but the change of adopting Hyperledger Besu EVM helped to extend support for more recent versions of solidity through Hedera Services module. Rather than opting out for a completely different smart contract language, this addition made Hedara more accessible and developer-friendly.
At this time of writing, the latest version of Solidity which Hedera is supporting is 0.8.9, in all of its networks (including public and testnets). For comparison, the latest version of solidity is 0.8.19. This means you may not able to use the most updated features of solidity with Hedera but for comparison’s sake, one of the biggest DEX, Uniswap V3 written in 0.7.6.
Let’s get started with the development
Step 1: Create an Account
Just like you need to have an Ethereum Account (or Ethereum Wallet) to interact with EVM-based blockchain protocols, Hedera also needs to have Hedera Account to get started. The difference is, you can use the same ethereum wallet address to interact in both development and mainnet tasks but Hedera wants to have two separate accounts.
So, to start development, go to portal.hedera.com and create a Testnet account by simply providing your email address and hit that “Start Building” button. It will ask you to verify your email address and create your portal profile.
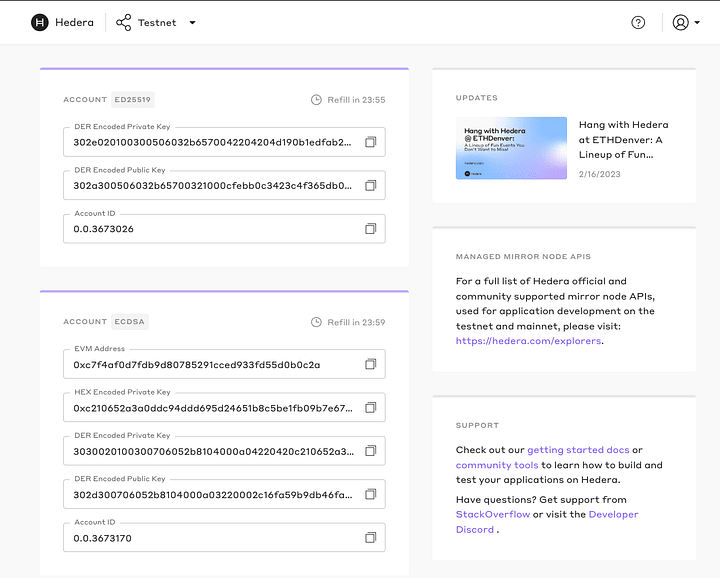
Once you have done that, you will get access to Hedera Portal. Click on “Create Account” button to have your first Testnet Account. This will create ED25519-based public and private keys along with an Account ID. But for this exercise, we are going to create an account with an ECDSA key. To do that, click on “Create ECDSA Account”
Hedera supports two types of cryptographic key pairs for its accounts: ECDSA and ed25519. In a nutshell, ed25519 is gaining popularity due to its efficiency and security properties but ECDSA is more widely supported by other blockchain platforms and systems. In this case, we are choosing ECDSA because, we need to have an EVM address to interact with.
Verify your account in Testnet
You can verify your testnet account by going to hashscan.io. Choose TESTNET from the dropdown beside the Dashboard link and paste your Account ID or EVM address in the search bar.
Step 2: Environment Setup
We are going to use one of the most popular Ethereum development tools in this step. We are going to use hardhat.
Create a new directory where you want to set up the environment.
mkdir hedera-starter && cd hedera-starter
Initiate a node.js project and install hardhat dependencies for it
yarn init -y
yarn add dotenv
yarn add --dev hardhat
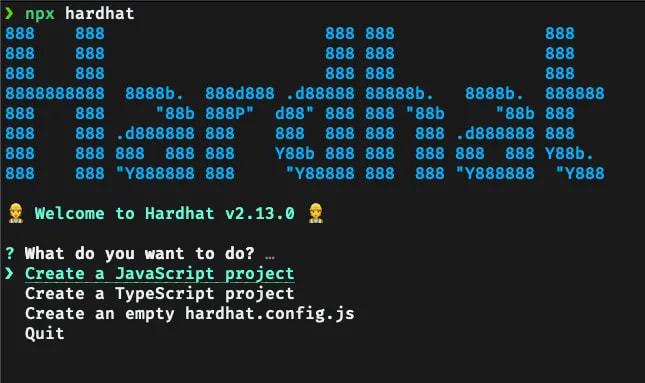
npx hardhat
And create a javascript project from the command line wizard.
Create an env file using the below command.
touch .env
Add OpenZeplling contracts to your project folder using the below command.
yarn add @openzeppelin/contracts
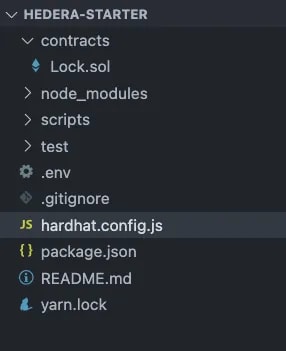
After completing that step, your folder structure will look like this.
In the .env file, add your ECDSA account details as below.
EVM_ADDRESS=<EVM_ADDRESS_FROM_HEDERA_PORTAL>
HEX_PRIVATE_KEY=<PRIVATE_KEY_FROM_HEDERA_PORTAL>
TESTNET_ENDPOINT="https://testnet.hashio.io/api"
CONTRACT_ADDRESS=<UPDATING_LATER_IN_THE_PROJECT>
When we are using hardhat, we need to have a JSON_RPC endpoint to connect with the Hedera testnet. For that, we are going to use Swirlds Labs hosted Hedera JSON-RPC-Relay called “Hashio”. This is still in Beta, so you can expect some downtimes or connectivity issues sometimes.
Let’s change our hardhat.config.js as below.
We are halfway there.
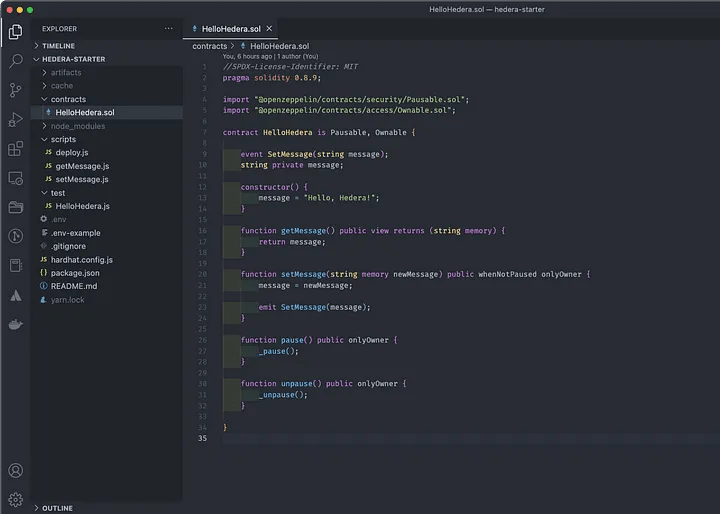
Instead of the sample smart contract coming with Hardhat, let’s write a simple HelloWorld contract along with OpenZepplin’s Ownable and Pausable contracts.
Even if it’s a very simple smart contract, let’s write some test cases to make sure that we are getting the right outcome.
Let’s write the deploy script
And Contract Call script next.
Finally, Contract Write script.
All done :)
This is how our final project looks like in the project directory.
Now, let’s deploy this smart contract to Hedera’s testnet. Run the below command in the terminal.
npx hardhat run scripts/deploy.js --network hashio
Once deployed, the terminal will show you the deployed address. Copy that and update it in the .env file.
Now, let’s call for getMessage()function in the smart contract.
npx hardhat run scripts/getMessage.js --network hashio
Finally, let’s write into the smart contract using setMessage()function.
npx hardhat run scripts/setMessage.js --network hashio
You can verify whether the message got changed by running the getMessage()function again.
Congratulations!
You have just deployed your first smart contract in Hedera.
If you want to try out the whole exercise without going through step-by-step, the full codebase is available here: https://github.com/anjana-j/hedera-starter
Final words
There’s no clear indication that how deep OpenZepplin contracts are supporting in Hedara yet! And there are limitations in OPSCODES support in Hedera as well. Because of this reason, some of the OpenZepplin contract might not going to work. However, there’s a partnership announcement saying that they helped to deploy ANZ A$DC StableCoin On Hedera.
The method to deploy popular ERC20 and ERC721 token contracts is a little different in Hedera. It uses a service called “Hedera Token Service”. Hold your horses before you deploy any token contracts there.
Happy coding!
Featured ones:


