dev-resources.site
for different kinds of informations.
The Complete Developer's Guide to Airtable Part 3: Interfaces
Airtable just launched interfaces. Which means it is time for a new installment of The Complete Developer's Guide to Airtable.
In this part 3 of the Complete Developer's Guide to Airtable, we'll dig into Airtable interfaces from a developer's point of view. We'll explore when to use an interface versus a script or custom Airtable App. We'll also walk through a practical use case to give you a sense of the build experience and functionality.
What are interfaces?
The name says it all. Airtable interfaces allow you to build a custom interface on top of your Airtable base to make it easier for different users to work with Airtable data.
So instead of needing to click and scroll through tables, views, filters, sorts, and apps, you can create an interface that surfaces just the data a user needs in a clean layout that fits on one screen.
An Airtable interface lives inside Airtable. Each user will need to have an Airtable account to access an interface (for now...).
Base owners and creators can build interfaces. Interfaces require no-code. You just need to drag and drop elements onto a canvas. An element in this context is just a UI component like a graph, table, or divider. Then, you'll configure an element to define its data source and functionality.
Once an interface is published, your users will be able to access interfaces right from your Airtable workspace - no need to click into the base at all. The interface shares permissions with the underlying base. This means any user that can access the base can access the interface.
Additionally, you can build many interfaces on an Airtable base. So you can easily create a tailored interface for each user group or stakeholder.
Airtable interfaces will be in beta until early 2022. During that time, they are available on all Airtable plans for free.
Author note: I would be very surprised if Airtable begins to limit access to interfaces in the future.
When to use interfaces
As a developer, when should you reach for an interface? What alternatives do you have?
First and foremost, you don't need to be a developer to use interfaces. Unlike scripts or custom Airtable apps, no javascript or React is required. It's completely no-code. So this is a great tool to democratize building in Airtable. Let your team go wild.
However, while Interfaces are in beta, there are a couple surprising feature limitations you should be aware of right from the start:
- Creating and deleting records is oddly limited. Yes, you can create and delete records from the grid element - but this is no different than working in the base itself. There are no "form" elements to help you build a smooth UI for creating records in an interface. Instead, an interface is really about working with already existing records.
- There are no button elements or easy mechanisms for triggering logic / scripts. Yes, if there is a button field in the underlying base, you can present that button - but you can't create buttons or trigger scripts right in the interface without cluttering up the base.
Even with these limitation in mind, an interface can make your base more accessible and usable when the raw table or views just aren't ideal. An Airtable interface should be your tool of choice when:
- You want to filter or curate the data from across your base into a "single view" for a specific user or use-case.
- All the users have Airtable accounts. You can't share interfaces outside your workspace.
- You don't need a lot of logic, scripts, or automation to make the workflow great. It's completely no-code and very usable for non-technical users.
With these limitations and capabilities in mind, it is fair to say that interfaces are primarily about building simple read and edit apps for your team with little to no scripting or logic. It requires no coding, so you can unleash your team to maintain and build these interfaces. However, as mentioned above, the simplicity comes with some drawbacks. If you need more control of state, user-flow or need to expose your interface to external users - you should reach for some alternative tools in the Airtable bench:
- If you need to create new records, delete records, or apply business logic an interface isn't for you. Consider a custom app or script.
- If you need to create records, just use a form. Interfaces are more about working with existing data.
- If you need to share data with users outside your base, use a shared view. Interfaces are for your team / workspace.
- If you don't need to interact with data but just need to display it - no need to over-build when the chart app or page designer can keep things simple.
Authors note: Overtime, Airtable will make it easier and easier to tie scripts and automations to an interface and share apps externally. This will provide Airtable with a no-code alternative to building a custom Airtable App and script. Doing so will make interfaces competitive with alternatives like Bubble or AppSheet.
Building an interface
To gain a working understanding of Airtable interfaces, let's build one.
The scenario
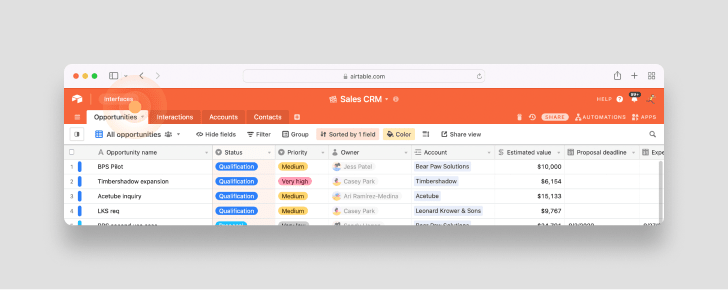
Let's say you are using the Sales CRM template to track your sales pipeline. To keep the CRM up to date and accurate, you want each sales person to update their opportunities every week. To make it easy for your sales team, you'll create an interface that shows each sales person the opportunities they need to update.
A three step process
Building an Airtable interface is a three step process:
- Configure your base.
- Build your interface.
- Test and publish your interface.
Configure your base
As a first step, setup the underlying data in your Airtable base to power your interface. In this case, given the structure of the Sales CRM base, you'll be building your interface on the opportunities table. You can already see that each opportunity is associated to a sales person with the owner column. However, there isn't a last_modified column for evaluating if the opportunity has been updated recently.
So add a new field. For the type, select Last modified time and name the field Last updated:
Your base now contains all the data required to build an interface.
Build your interface
Building an interface requires no code. You'll simple create a new interface in your base, select a layout, configure your data sources, and then add your elements. Let's get started.
First, click the Interfaces link in the top left corner on your base to open up the interfaces page:
A marketing page describing interfaces will appear. Click the Start building button and then proceed to give your interface a name and description. In this case, you can name the interface something like Pipeline Console. Keep in mind that this isn't the name of the exact interface you are building, but is instead the name of a set of interfaces associated to this base:
You'll now be prompted to select a layout. Oddly enough, some elements (like the record list) are only available in some layouts. So instead of starting from a blank layout and adding every element, you'll select the Record review layout and then click Next:
Connect the Opportunities table to your interface by selecting it from the Table drop down.
As you'll recall, we want to show each sales person any opportunities they own that haven't been updated in the past week.
You'll translate these requirements into a filter with two conditions:
- The
Ownerof the opportunityisthecurrent user - The
Last updatedtimestamp on the opportunity (i.e. the column you created previously)is on or beforeaweek ago
Once the filter conditions are in place, click the Next button:
With your table connected, you can now select which elements from the table you want to display in your interface.
In an interface, an element is the equivalent of a UI component. So think graph, table, or image.
In this context, you're selecting which field from the opportunities table should appear as an element in your interface. You can select all the elements except Owner, Account, and Last updated since these fields are assumed in the table filters you applied.
Then, click the Next button:
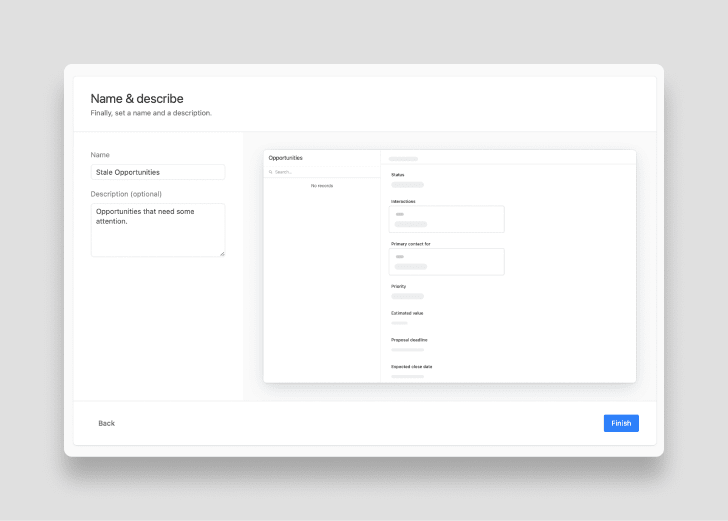
You'll now name and describe this specific interface your building. A name like Stale Opportunities should do the trick. Then click Finish:
Your interface will now be be generated. But, because your Airtable user doesn't own any of the opportunities (per the filter you created earlier) the interface will appear blank - which will make it hard to build a good looking interface.
So, as a first step, click the View as: link in the upper left and select a user that is associated to some opportunities. Perhaps Casey Park:
Voila - your interface comes to life with data. Now, you'll tune the interface to the specific needs of your sales people. Staring with the record list on the left.
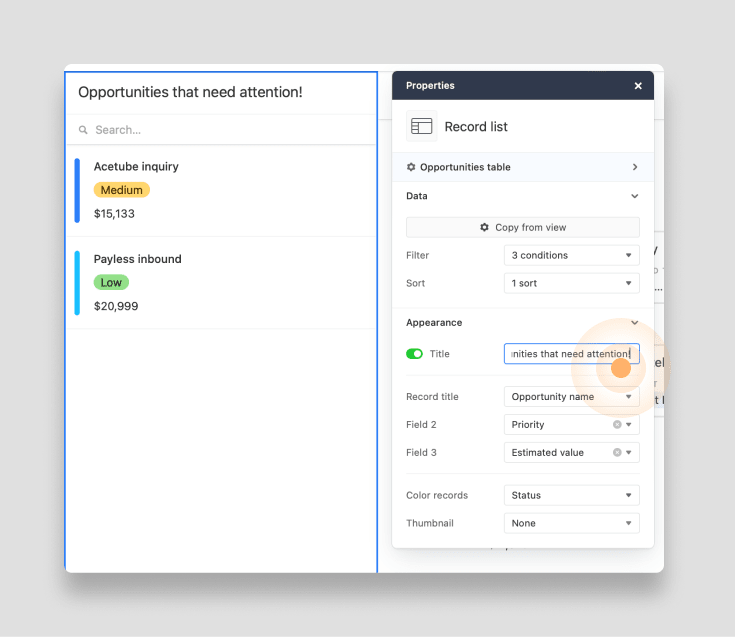
Click on the record list to select it. In the configuration modal that appears, you can edit the element. In this case, update the filter to also exclude opportunities with the status Closed — won or Closed - lost since these opportunities are already closed, your sales people do not need to update them:
Then, to make the record list more helpful, make a couple more adjustments:
- Sort the records in the list by
Priorityso your sales people always address the most pressing opportunities first. - Change the title of the element to
Opportunities that need attention!so your sales people know what they are looking at. - Show the
Opportunity name,Priority, andEstimated valuefields in the list to help them pick the right opportunities. - Color the records by
Statusto further help the sales people move quickly through the interface:
With the record list looking good, move on to the rest of the layout. Simply drag and drop the elements into place. Then, configure each element to your needs.
If you would like, you can always drag and drop additional elements onto your interface by clicking the + Add element button and then dragging the element into the interface:
Below, is an interface layout you can replicate. At the top, important fields like Status, Priority and Estimated value are front and center - easy for the sales person to update.
Further down the page, the sales person can update the Proposal deadline, Expected close date, or add a new Interaction:
This drag, drop, configure paradigm captures the process of building an interfaces. It's pretty easy. Now, let's see it all working.
Note: in this practical example, every element is connected to the
opportunitiestable. But, you can always tie elements to any table in the underlying base by simply expanding the connected to section in the configuration modal.
Test and publish
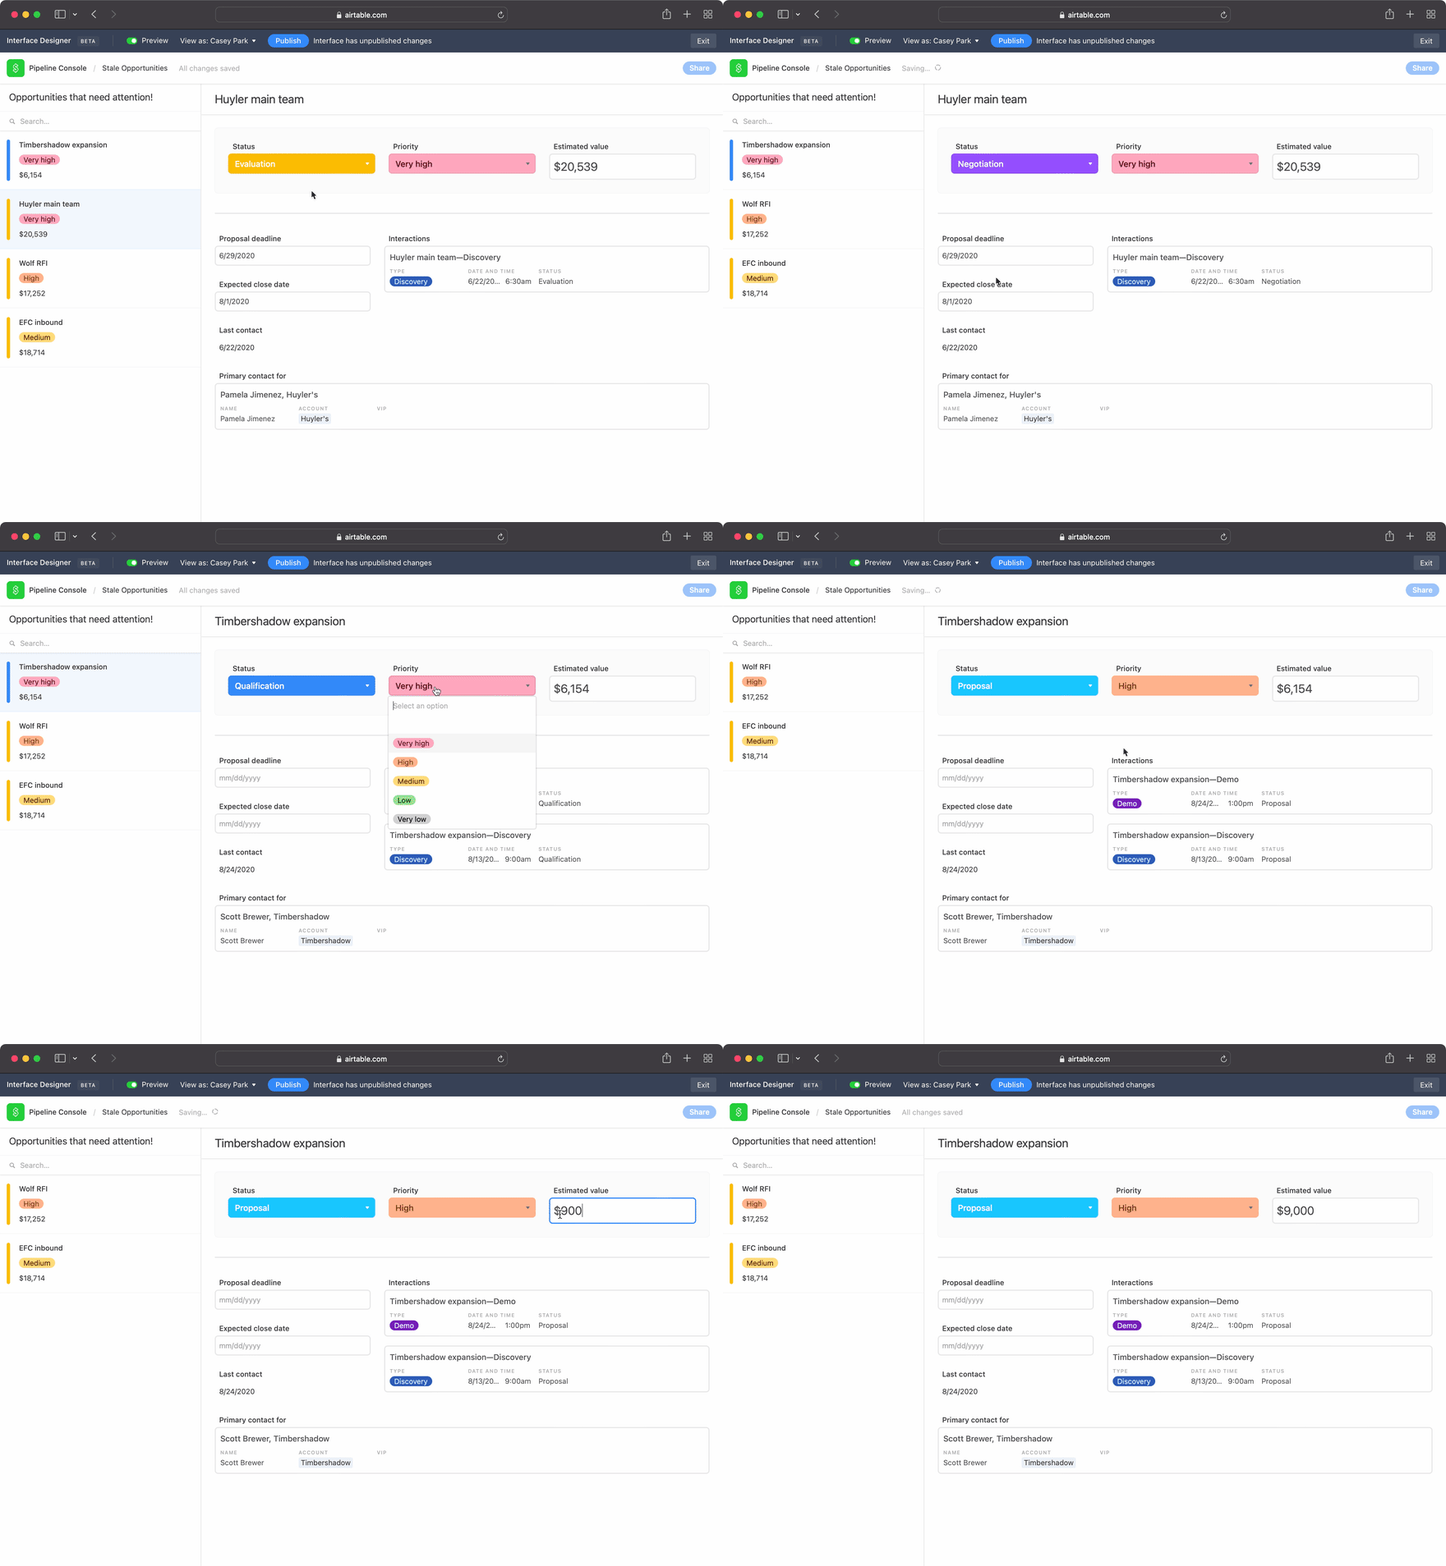
As a last step, toggle the Preview switch in the upper left and test out your app:
You'll see that only the opportunities that are stale appear in the left the record list. Then, as you update the opportunity, it is instantly removed from the list. What an easy workflow for your sales team!
As a last step, click the blue Publish button and in the modal that appears publish your changes:
Your interface is now live. Your team can access it right from the top of Airtable's home page:
Or send your sales team a link and have them bookmark it for easy access. The interface shares permissions with the underlying base - so feel free to invite and restrict access as needed.
Conclusion
Interfaces make Airtable even more powerful for your team.
Airtable Interfaces give teams the data they need to do their job all in one screen — saving time, reducing mistakes, improving visibility, and helping your business or project run smoothly.
As a developer, interfaces can replace all sorts of use cases that would otherwise need a simple script or custom app. And better yet, non-technical team members can own these interfaces. This allows you to focus on the heavier use cases that need business logic, integration, and automation.
At the moment, Airtable Interfaces are a little under-powered. You can't easily create or delete records, connect scripts / automations, or share interfaces externally. But even with those short comings, the value is obvious. We're excited to see Airtable continue to iterate and improve this new feature.
Featured ones:


