dev-resources.site
for different kinds of informations.
How to Easily Add Social Media Icons in WordPress
It is always easier to interact with other people on social media than on your own WordPress website. That is why on many websites, they add a few icons to direct readers to their social platforms like Facebook or Instagram. If you want to have impressive and convenient social media icons like that, let's follow our construction in this post. We will show you how to link your social media channels to WordPress websites by using a plugin.
What are Social Media Icons and Its Benefits?
To get started, we will discover what social media icons are and why we should have them on our website.
Social media icons are the icons that link to the social media websites like Facebook, Instagram, Twitter of the website's owner.
However, don't mistake the these icons with social sharing buttons. Social sharing buttons allow you to share a post/page to your own post social media platforms. If you want to know more about how to add social sharing buttons, this post can help you.
Social linking is really helpful for making your WordPress website recognizable to various people on different social media platforms. Hence, you can make your website more popular and interactive with potential readers.
How to Add Social Media Icons to Your WordPress Site
There are many ways to create social media icons for your WordPress website. We have some examples:
- Use a theme with a built-in social media menu / widget feature, then read the documentation of the theme to add them. Different themes have different ways to add social links, so remember to read carefully!
- Use a page builder. One thing to notice is that not every page builder can support you to add a social icons module.
- Use a plugin. Personally, I think this is the fastest and easiest way, not regarding how amateur you are in WordPress.
In this post, my choice is Simple Social Icon - an easy-to-use plugin just as its name. You just need to keep 3 steps in your mind.
Step 1: Install Simple Social Icon Plugin
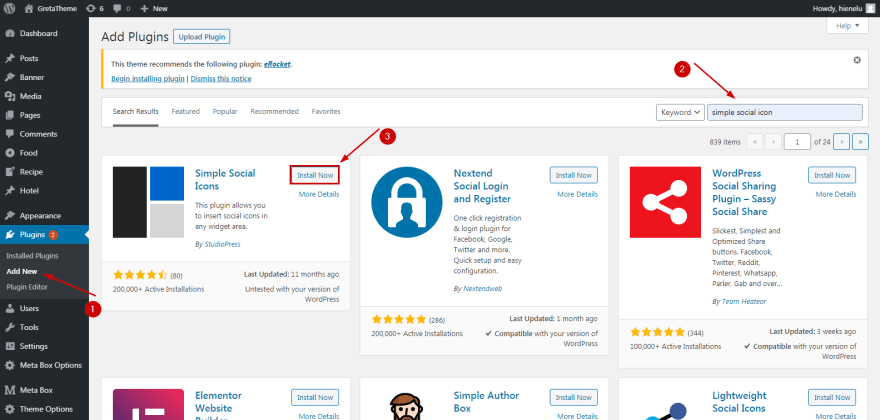
You can download and install plugin by going to Dashboard > Plugin > Add New. Once seeing Simple Social Icon, click Install > Activate.
Step 2: Look for the Widget and Locate the Icons
After successfully installing and activating the plugin, you will be given a widget named Simple Social Icon. This is where you can add your social links and customize the display of them. There are two options for you:
Option 1: Use Admin Dashboard
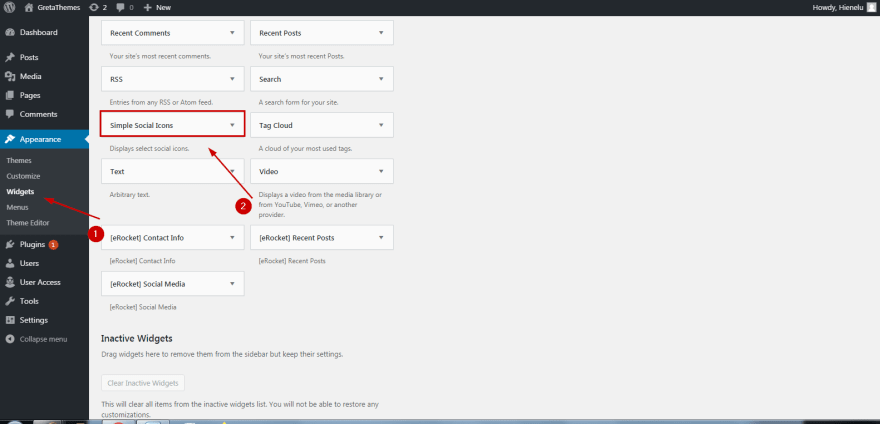
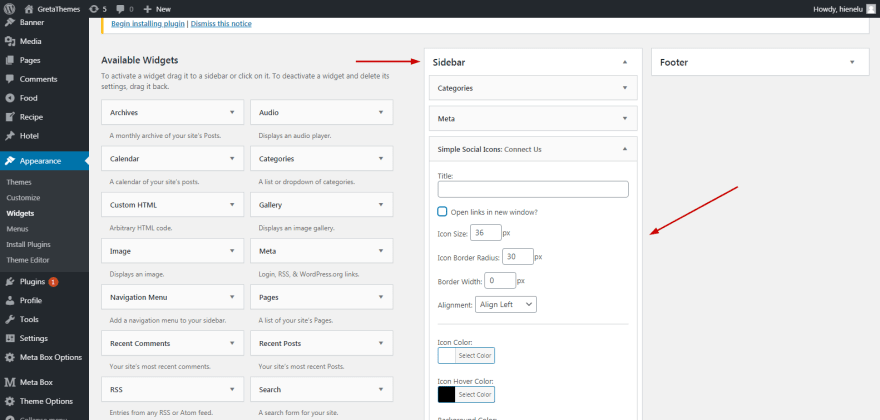
To look for the widget of Simple Social Icon plugin, go to Appearance > Widget, search for the name Simple Social Icon and click on it.
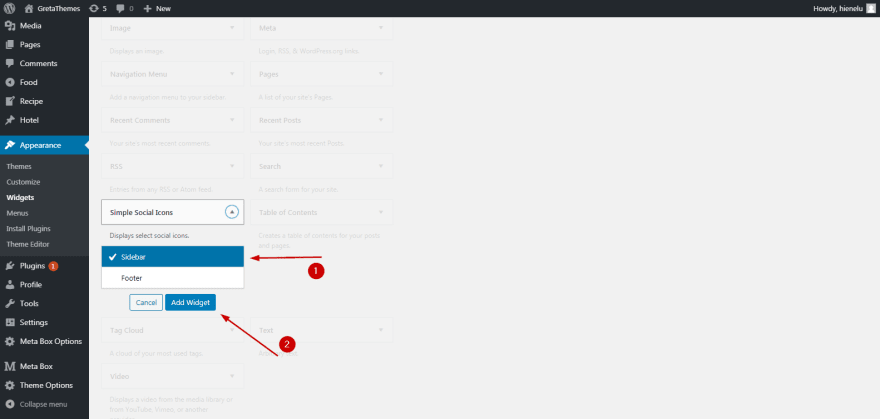
Then, just find a desired location for your social icons. Note that each theme has different widget areas. For example, I choose Sidebar to display social icons, then click Add Widget.
This is when you can see the widget along with some custom options display on the sidebar. You will add links and customize the display of social media icons here.
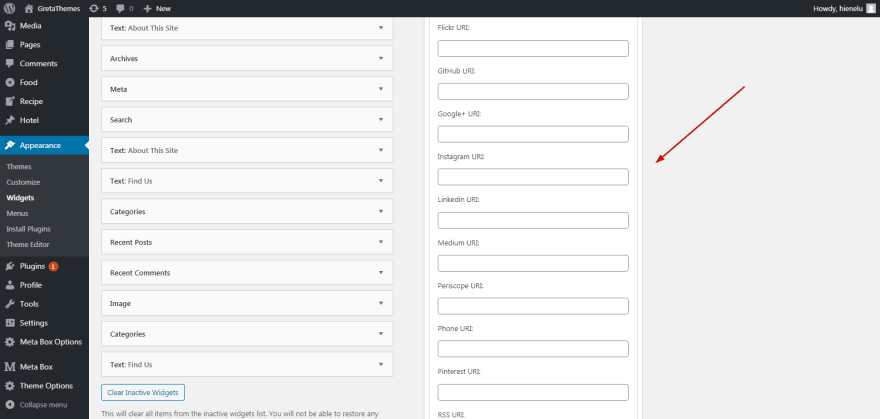
It can't be more simple, actually. Just add the links into the corresponding tabs, and there you're done.
Simple Social Icon allows you to add up to 20 social links, from the popular ones like Facebook, Instagram and Twitter to the less popular. Hence, you can insert various kinds of social media linking icons to your WordPress site.
However, custom links are not supported in this plugin. So if you have any links not included in the list above, you can't add them.
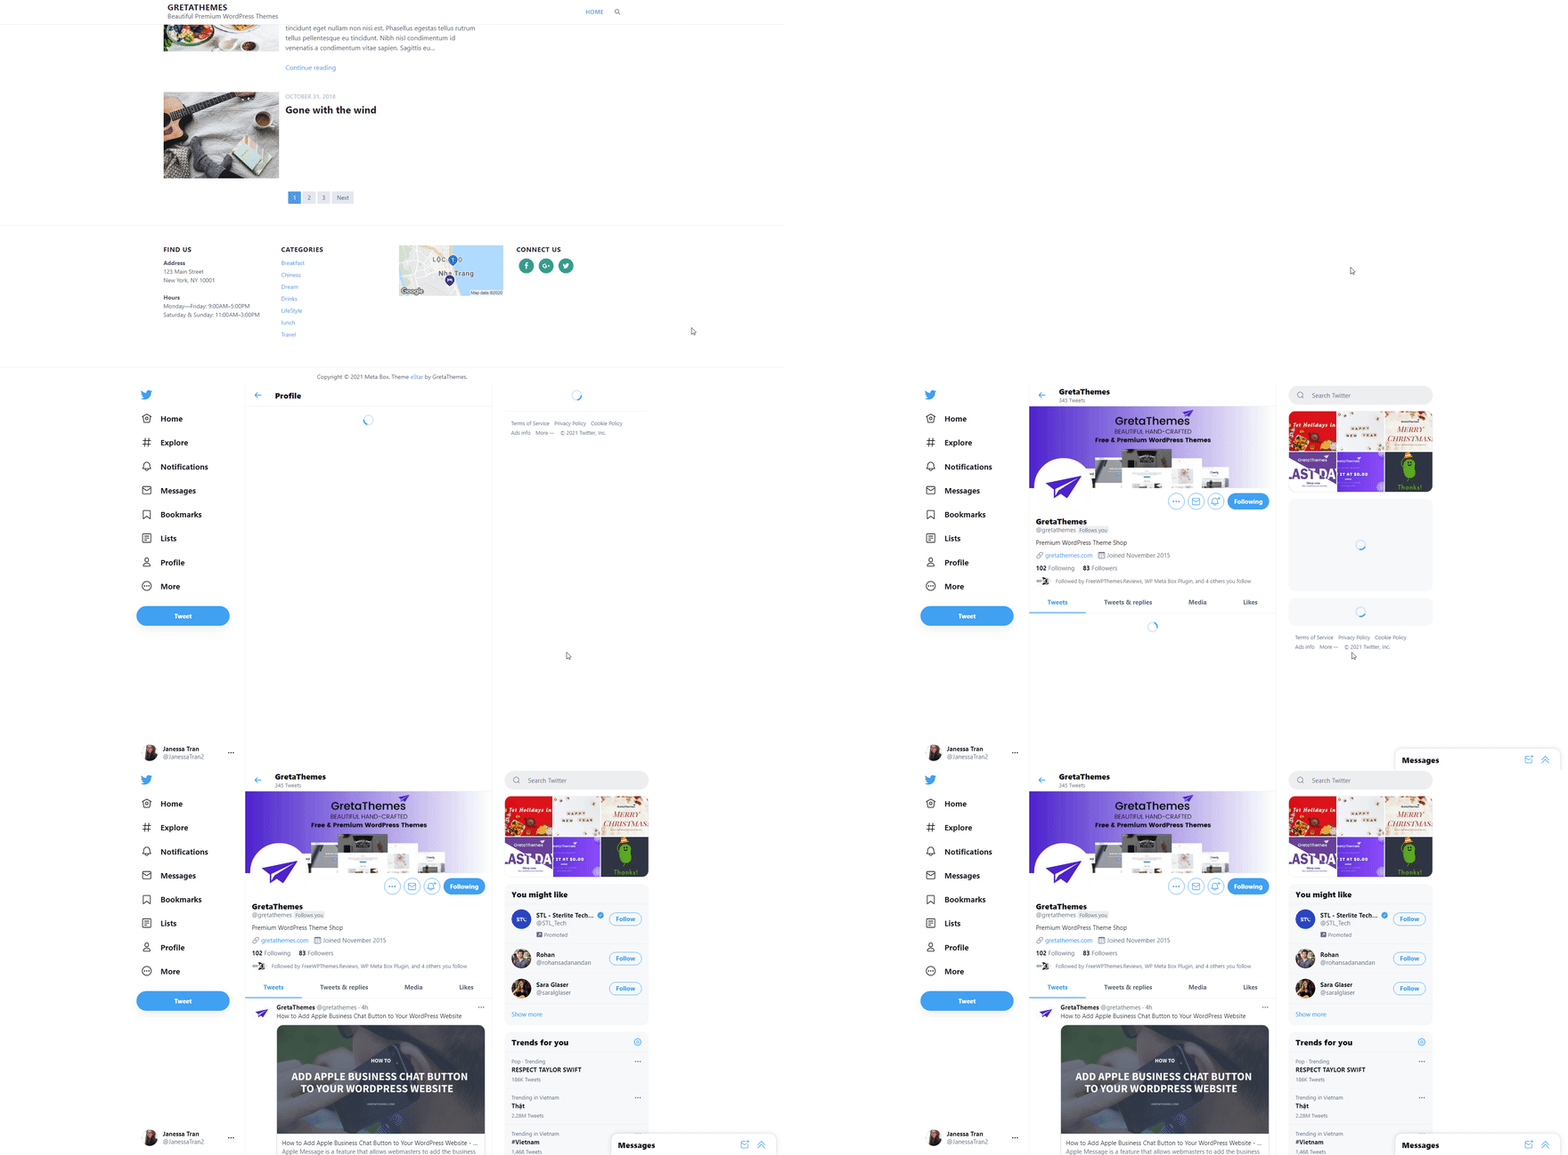
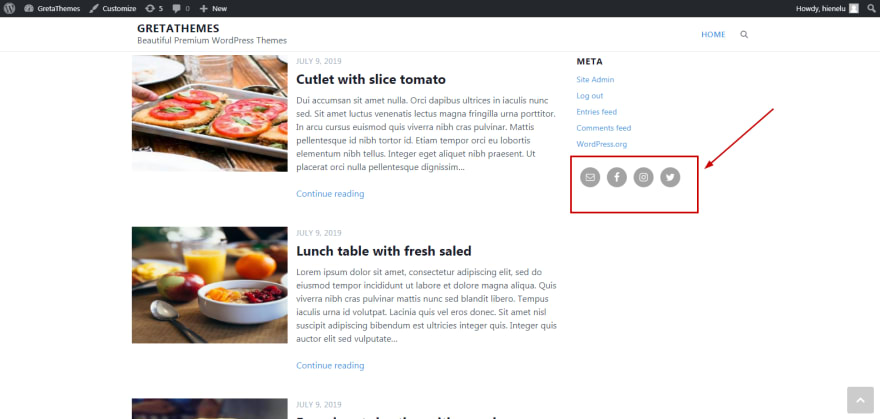
Now, let's see the result after I added some links to my website:
Option 2: Use Customizer
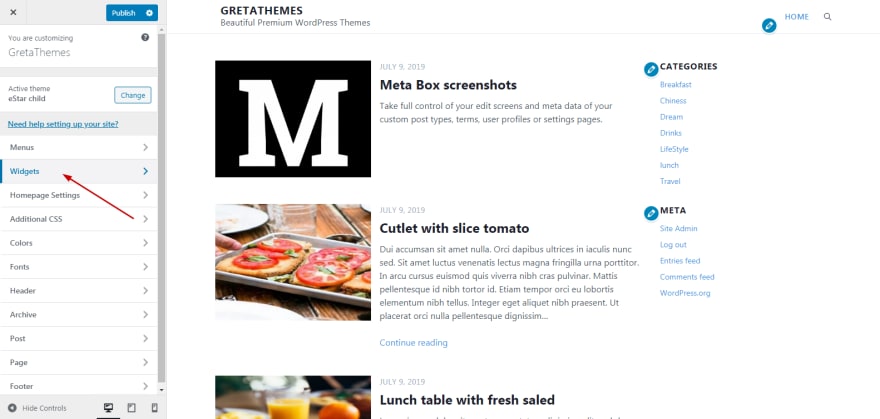
You can also customize and add social links using Customizer. The advantage of this way is that you have real-time preview - that means you can customize and see your social media icons displayed at the same time.
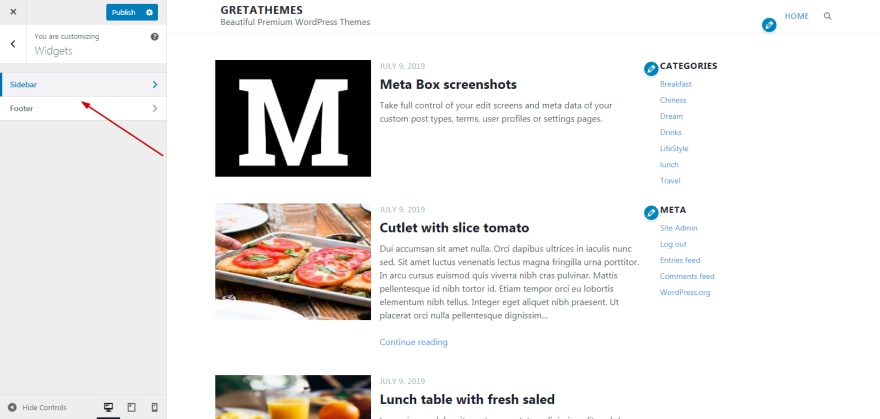
First, go to your website and click Customize
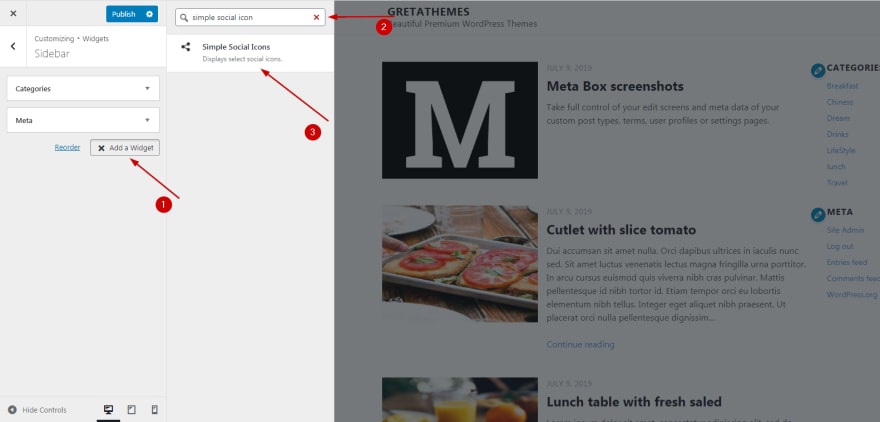
Go to Widget and find a nice location for your social icons, just like the Option 1.
After locating the links, click Add Widget and type Simple Social Icon in the search bar, then click on that widget.
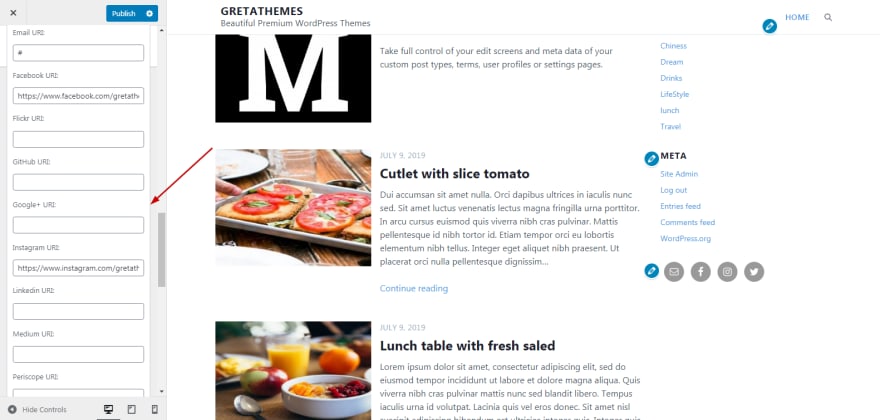
At this time, add links into the corresponding tabs, like what I have told you in the option 1.
After adding all the links, this is what I have:
Step 3: Customize the Size and Color of Social Linking Icons
Customizing social linking icons is important to make your website more eye-catching. You just need to go to Admin Dashboard or Customizer on your website.
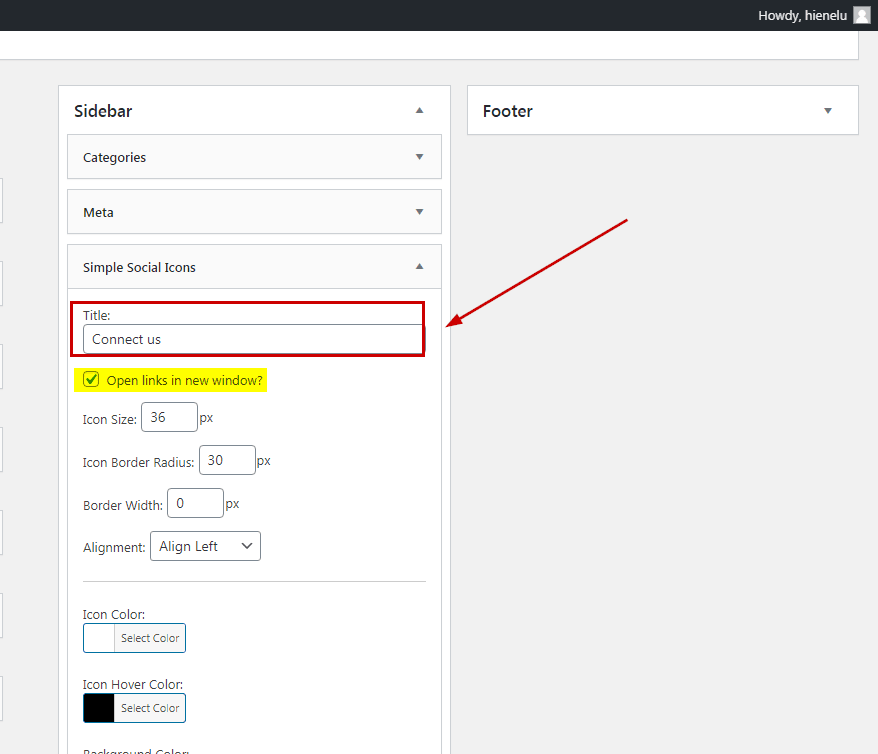
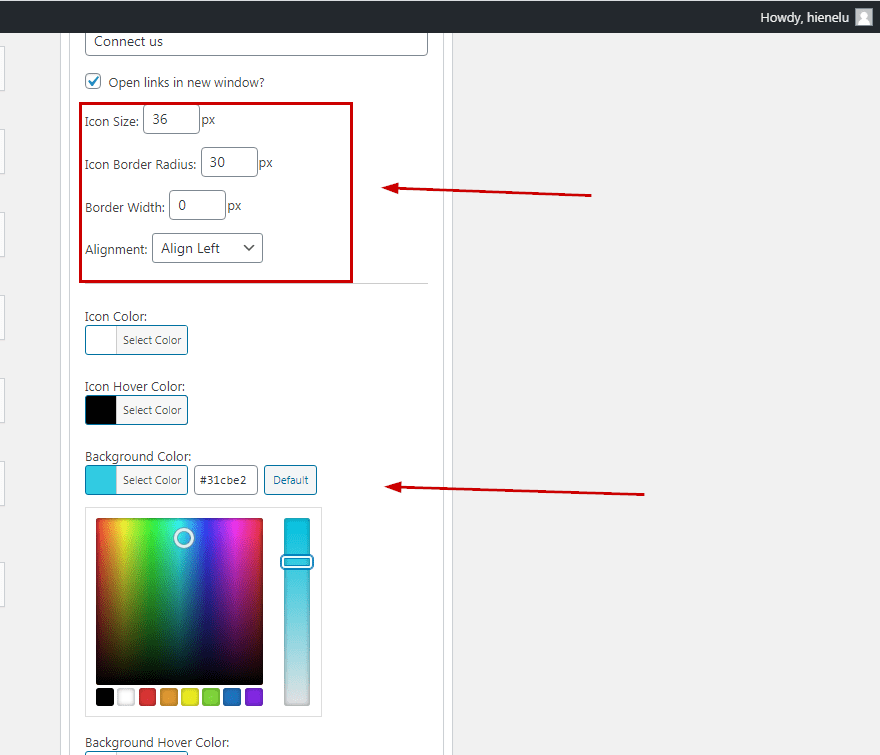
Before customizing the size and colors of social linking icons, you can write a title for them. An impressive title can be useful to urge people to click on your social icons. So remember to keep titles short and attractive, such as Follow us, Connect us, Let be friend with us,...
After that, you can choose to either click on Open links in the new window or not. For me, I will click on this option so that it can be more convenient for the users.
Next, customize the size and colors of social media icons.
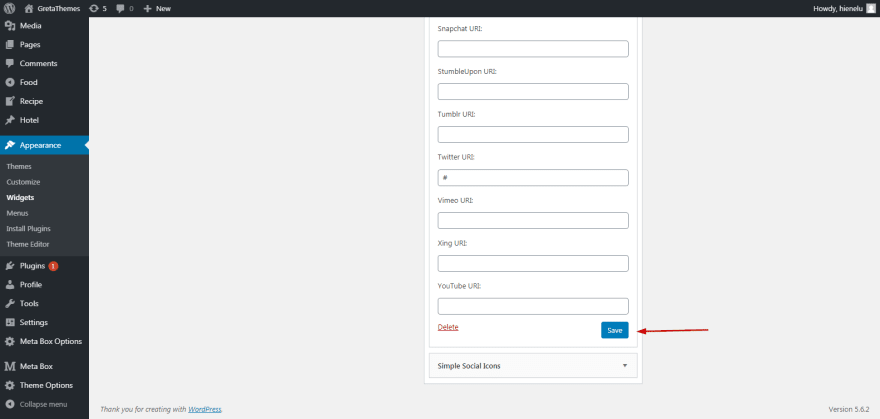
Finally, click Save if you use Admin Dashboard.
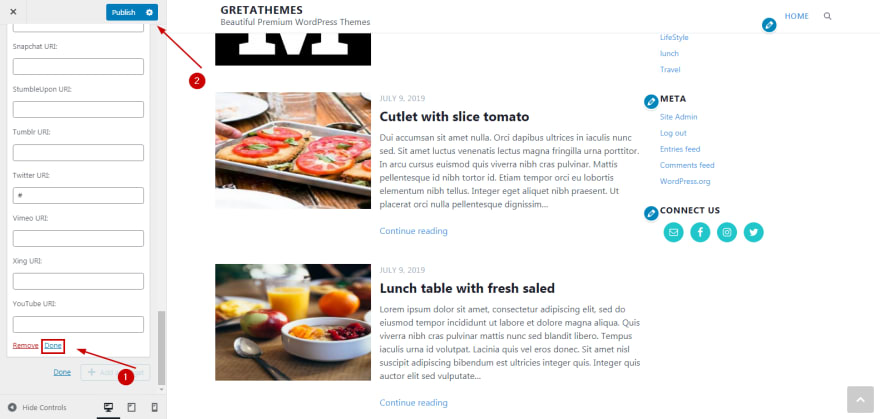
Click Done > Publish if you use Customizer.
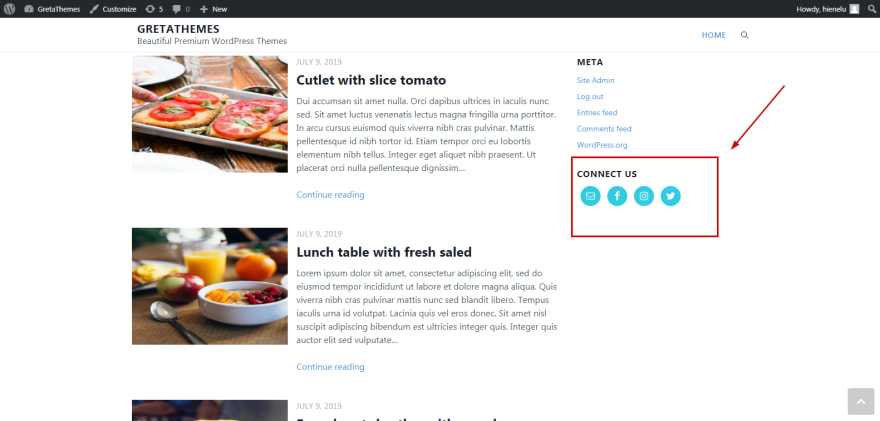
The social icons will be exactly as you have just customized.
That's it! Your website is ready to display its own social linking icons!
The verdict
Adding social media icons is as easy as eating a cake, isn't it? Just follow our instructions and you will not be disappointed. Making your website more professional with these social media icons is more likely to impress your targeted readers. If you have any questions or recommendations, don't hesitate to leave us some comments below. We are willing to listen to you.
Featured ones:
