dev-resources.site
for different kinds of informations.
How to Export and Import Category / Taxonomy in Wordpress
You need to move categories / taxonomies from a website to another, but there are too many of them. More than that, manually creating each category is too time-consuming and easy to make mistakes. Additionally, WordPress does not support export and import taxonomy in default, including category. Sounds freakingly tiring, isn't it? In this case, you should export and import categories automatically to save time and avoid making mistakes.
In this post, I'm gonna tell you how to use WP Import Export Lite plugin to export categories from a website, then import them to another site. You can also use this plugin to do the same thing with other taxonomies.
Notably, I just export and import category information like names, descriptions, etc. If you want to export and import data of posts in the category, you can see through this post.
Now, let's get started!
Export Data of the Category with WP Import Export Lite
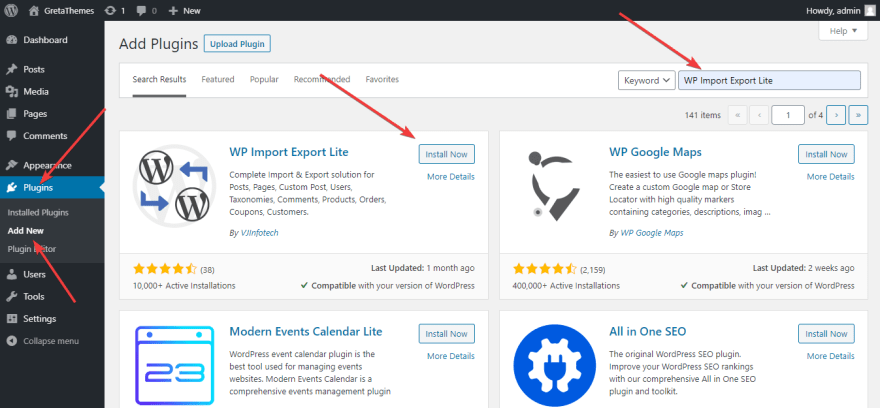
First, you need to install and activate the plugin. WP Import Export Lite plugin is free and available on wordpress.org.
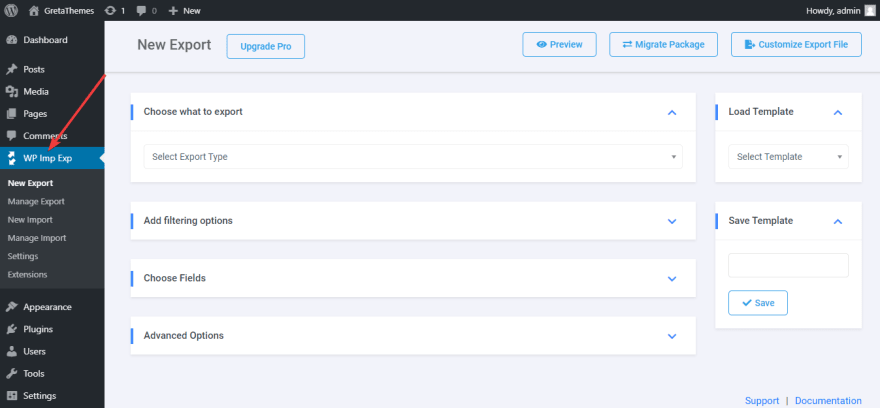
After installing, a new menu named WP Imp Exp will show up on the admin sidebar of WordPress.
Keep in mind that you need to install WP Import Export Lite on both websites to make it work!
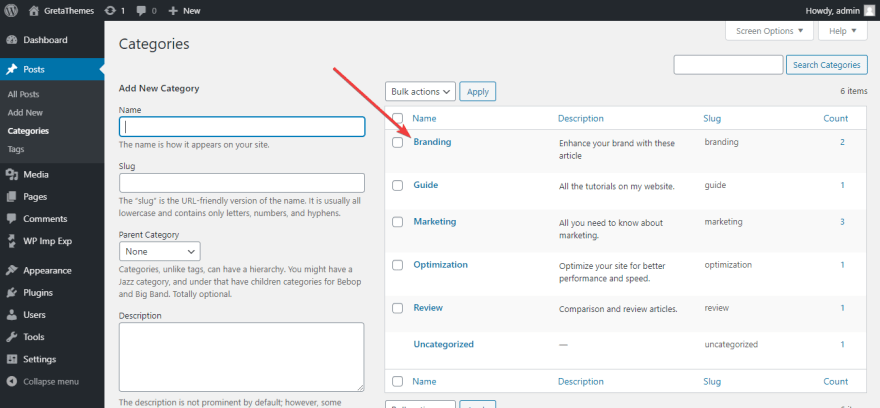
The original website has 6 categories like this:
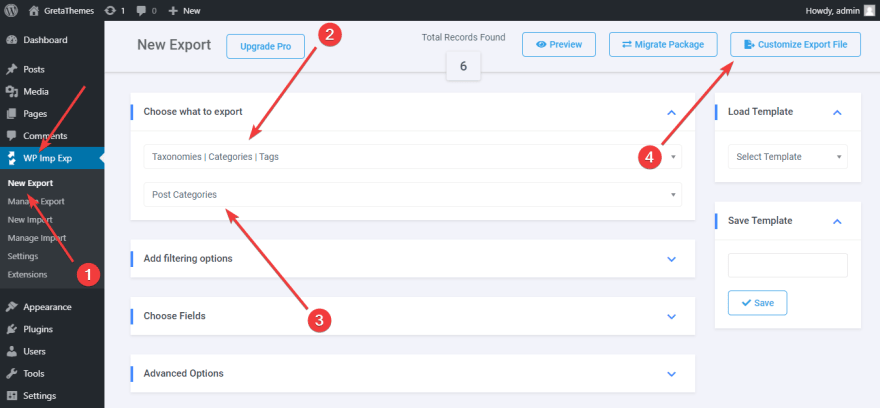
To export a category from this one to the other, go to WP Imp Exp > New Export (1).
In the Choose what to export section, choose Taxonomies / Categories / Tags (2), then choose Post categories (3).
After that, click Customize Export File (4).
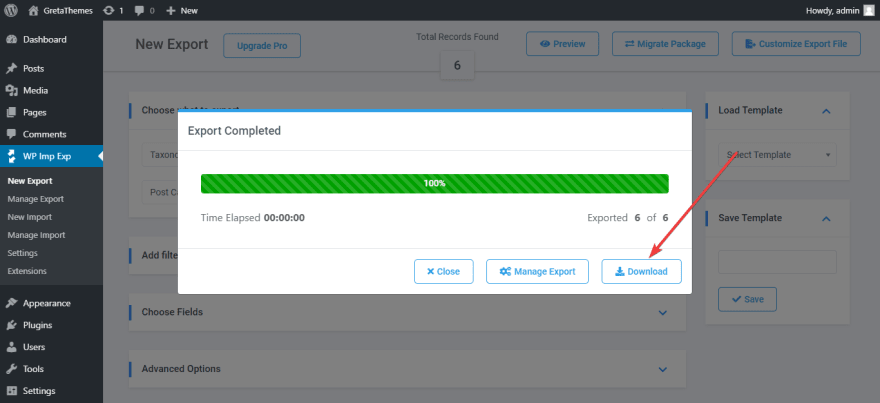
Wait a minute for the plugin to export data, then click Download:
There I have a .xml file:
This file has all data of the category in the original website. What we need to do now is importing it to the target website in the next step.
Import Data of the Category to WordPress Website with WP Import Export Lite
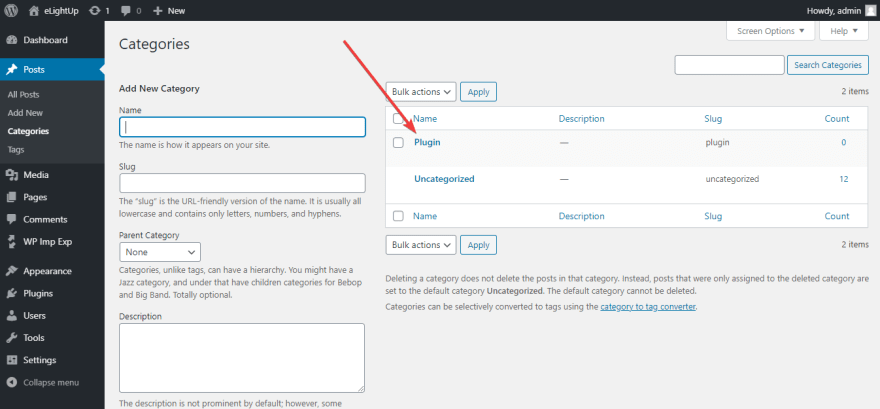
Now I will log in the WordPress website that I want to import my category to. Before importing, it only has 2 categories: Plugin and Uncategorized (a default WordPress category).
I have installed WP Import Export Lite on this site, so we will skip the plugin installation step.
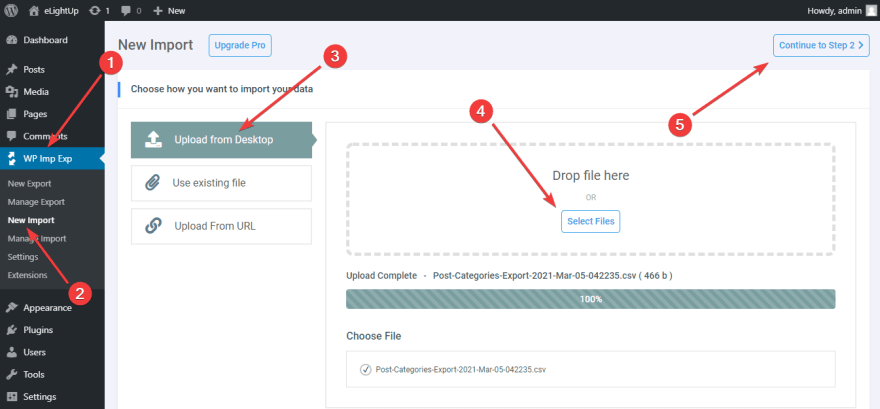
To import data of the category to the new website, go to WP Imp Exp > New Import and follow these steps:
Step 1: Choose a File to Import
Go to menu WP Imp Exp > New Import.
Choose Uploads from Desktop, upload file .xml that we have just downloaded, and then click Continue to step 2.
Note: You can choose an available file from the website or upload it from a URL if you want.
Next, you will be directed to the step 2 screen.
Step 2: Choose Data to Import
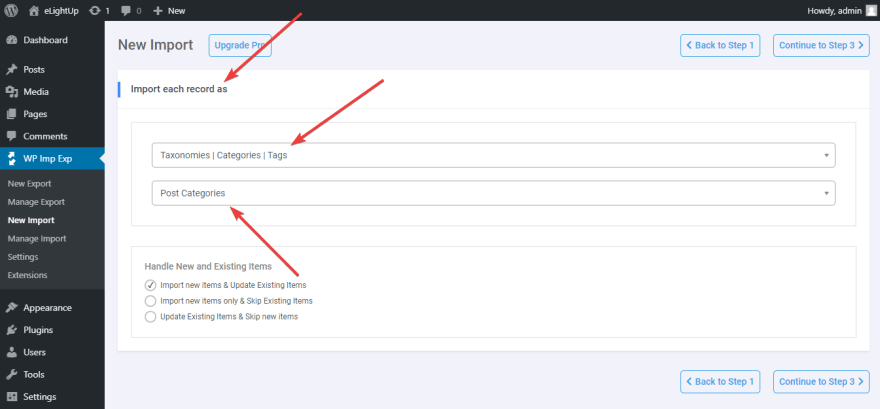
In the tab Import each record as, once again we choose Taxonomies / Categories / Tags > Post Categories to import the categories' data:
In the Handle New and Existing Items checkboxes, you have 3 options to import files:
- Import new items & Update Existing items
- Import new items only & Skip Existing Items
- Update Existing Items & Skip new items
Here I choose Import new items & Update Existing Items. After choosing, move to step 3.
Step 3: Configure the .xml File
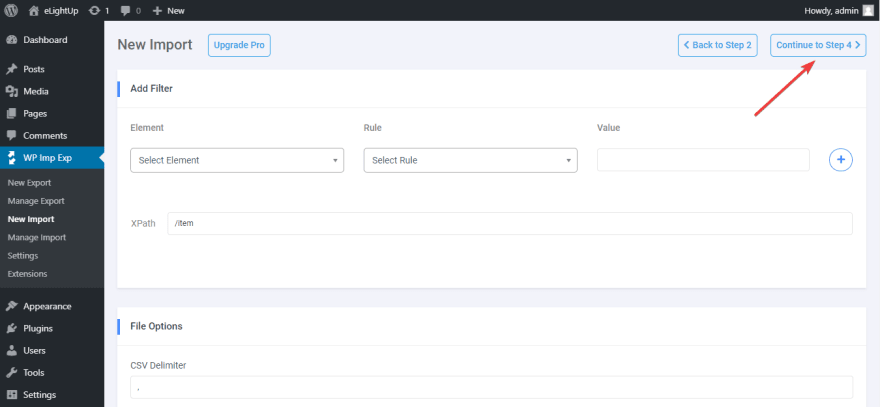
This step includes some advanced options to configure the .xml file, such as Add Filter, File Options, File Data Preview. To get more details, you can click here.
These options require some technical knowledge. However, we only need to import normal categories, so you can skip this step and click Continue to Step 4.
Step 4: Choose Content to Import in the Category
WP Import Export Lite plugin supports importing a lot of content types like names, descriptions, images, ... But as I have said before, I only import the category's name and description.
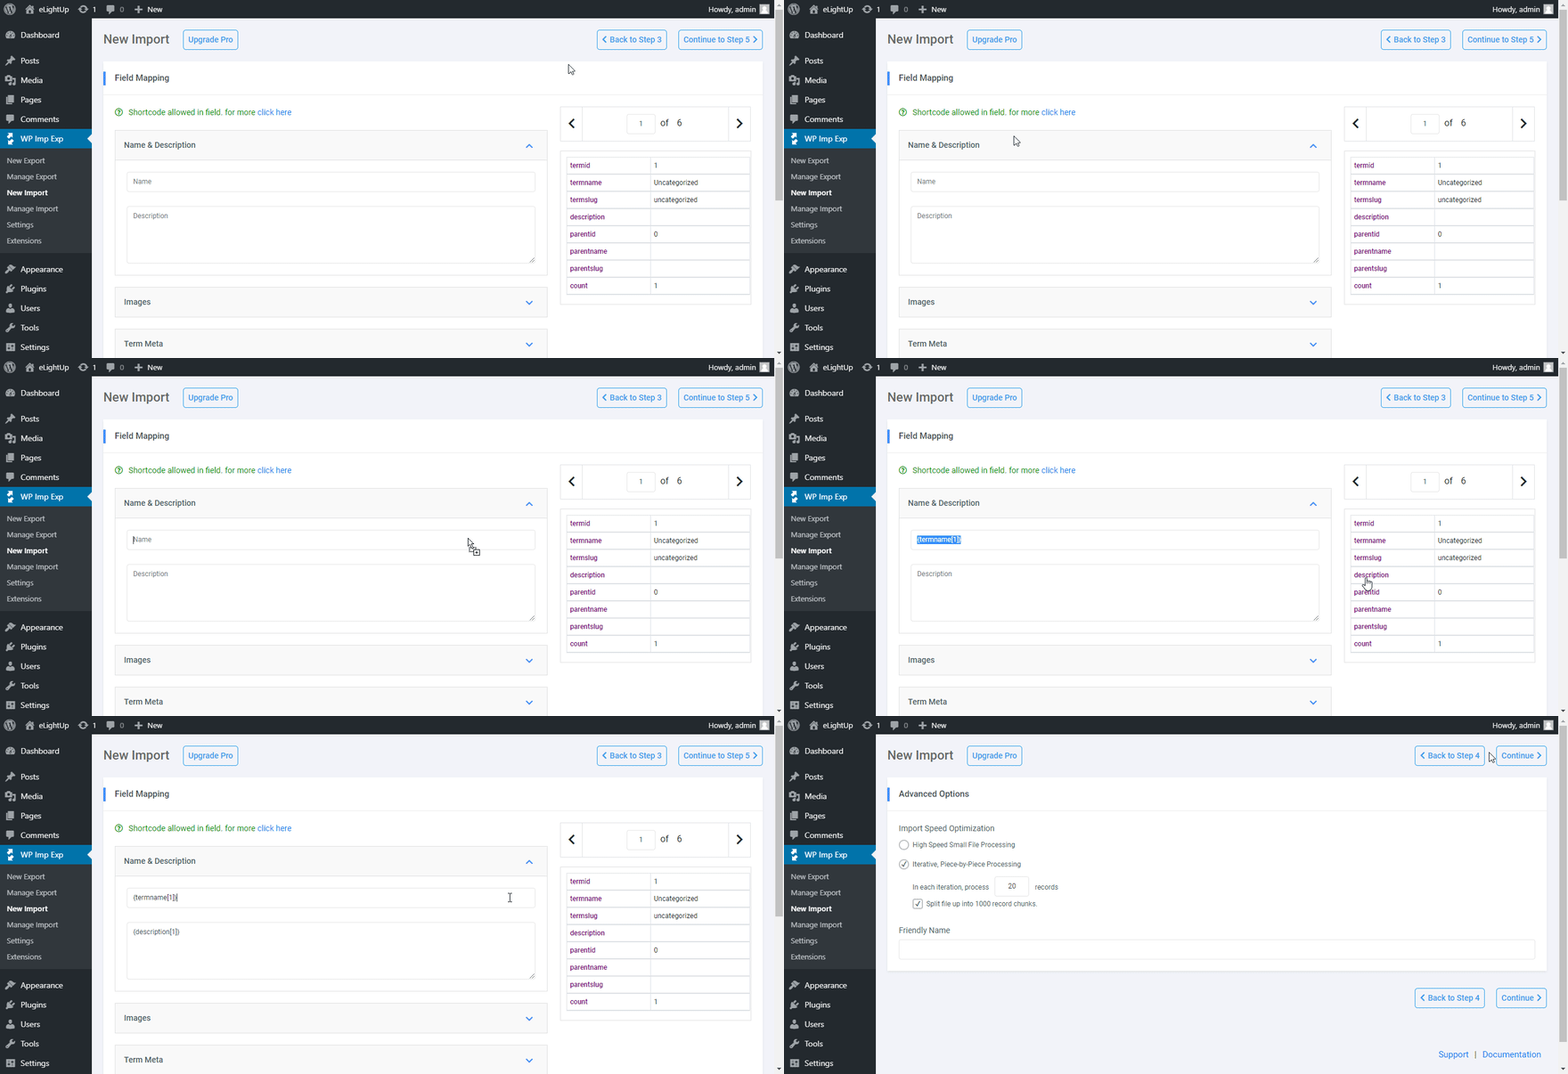
First, go to Field Mapping > Name & Description. Next, drag and drop the termname and description tags to assign them to the category, then click Continue to Step 5 like what I do in the gif below:
Step 5: Optimize Importing Speed
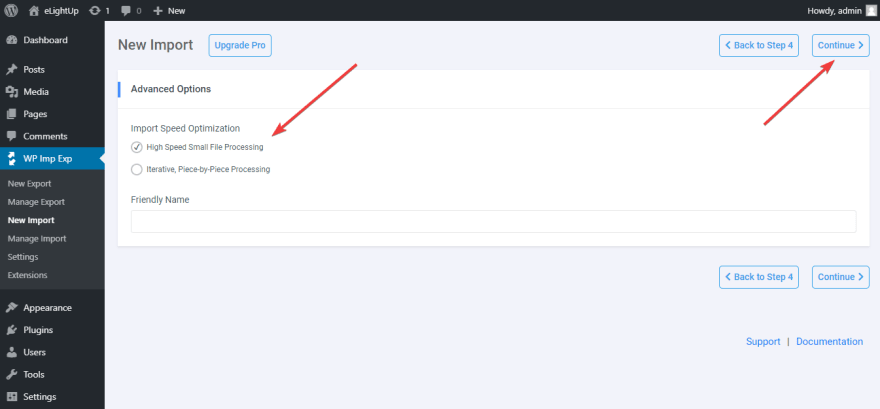
In Import Speed Optimization, you have 2 options:
- High Speed Small File Processing
- Iterative, Piece-by-Piece Processing: divide a file into small parts and process one by one. If your file is too large and consumes a lot of time to process, you should choose this option.
Here I choose High Speed Small File processing. After that, click Continue.
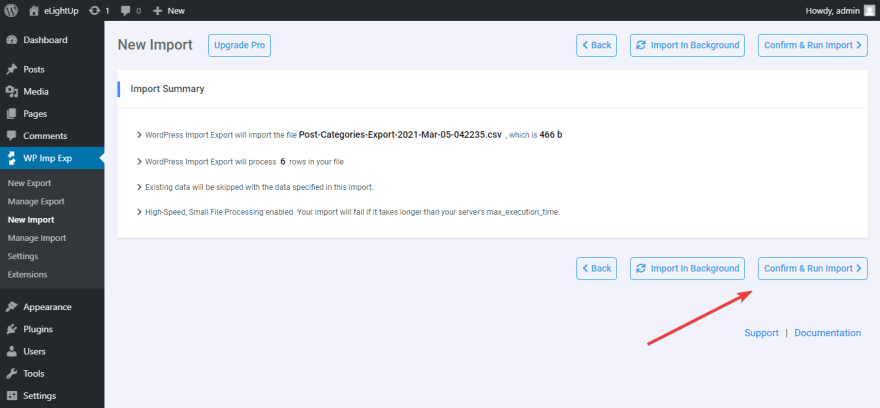
Finally, click Confirm and Run Import:
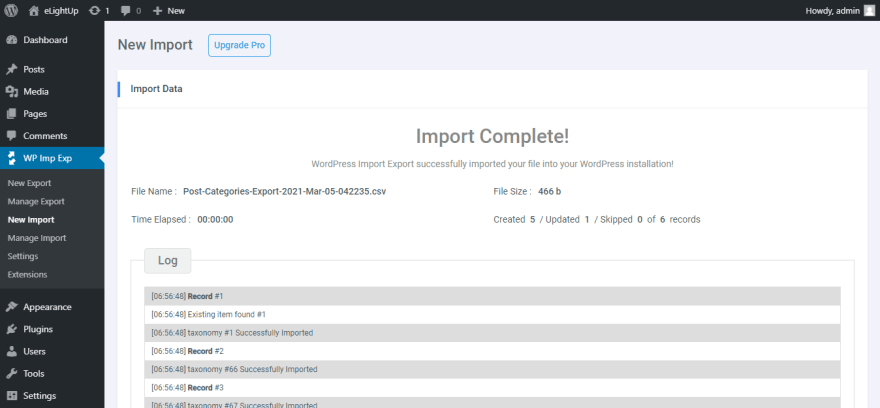
After having it done, the importing report will show up like this:
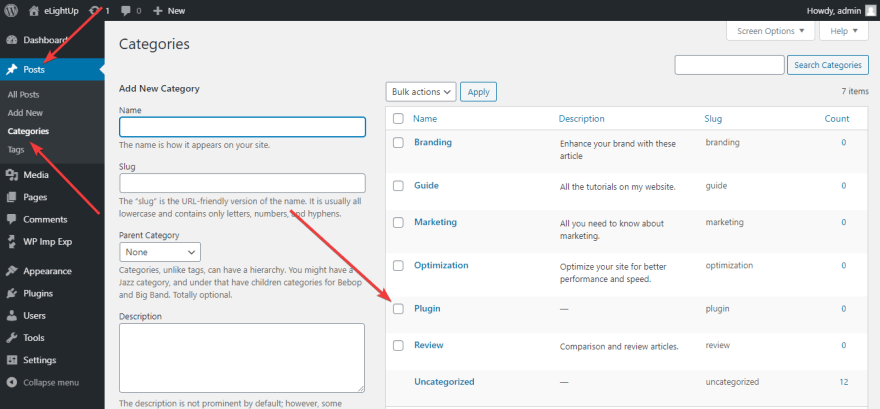
Now I will check the result by going to Post > Categories:
As you can see in the above image, beside the default categories Plugin and Uncategorized, my new categories have been added with descriptions.
Last Words
Exporting and importing categories become extremely easy with WP Import Export Lite plugin. If you follow this tutorial strictly, you will definitely make it done.
In addition to category, tags are also helpful tools to help web owners categorize and organize posts. You can combine using tags and categories to manage your post effectively like the tutorial in this post.
Featured ones:
